Testing React App With Jest & Puppeteer

So you’ve created your react application and now you have to write end-to-end tests in order to make sure your application works as expected from the end user’s perspective. In this article, I will provide a simple step-by-step guide on how to achieve this using the Jest testing framework and the Puppeteer library.
Before we continue, it’s important to note that a react application created using create-react-app will come pre-packaged with Testing Library, which more or less allows us to achieve the same thing this article addresses. Here is a brilliant article that explains how to run tests using Jest and Testing Library.
So why puppeteer? Well, there are many reasons you might choose to go with puppeteer instead. Maybe there is some functionality that is unique to puppeteer that satisfies a very specific use case. For me, it’s a matter of personal preference, I prefer the way Puppeteer handles interaction with the DOM.
1. Creating the app
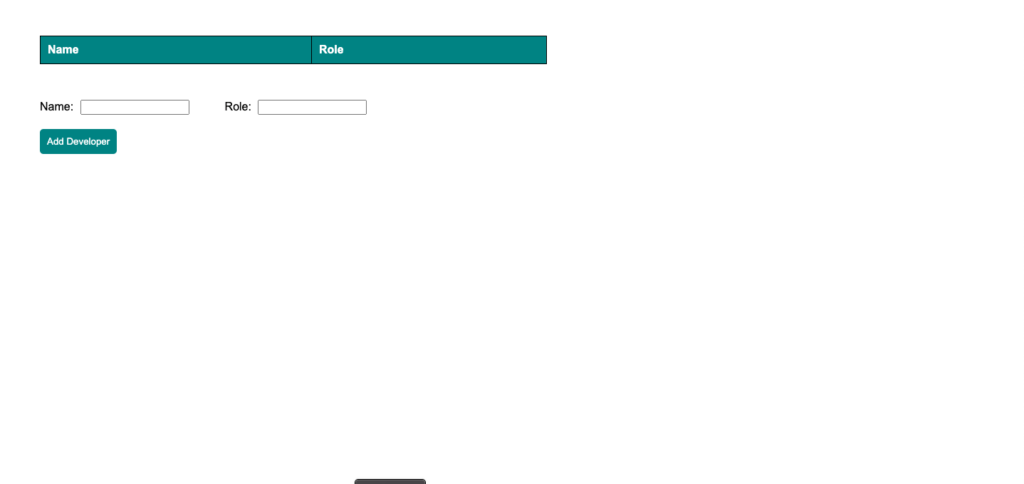
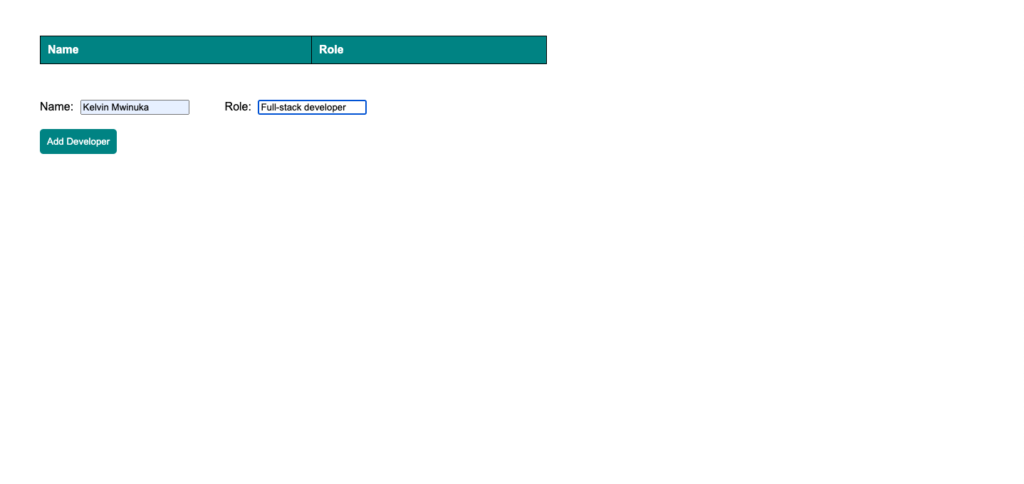
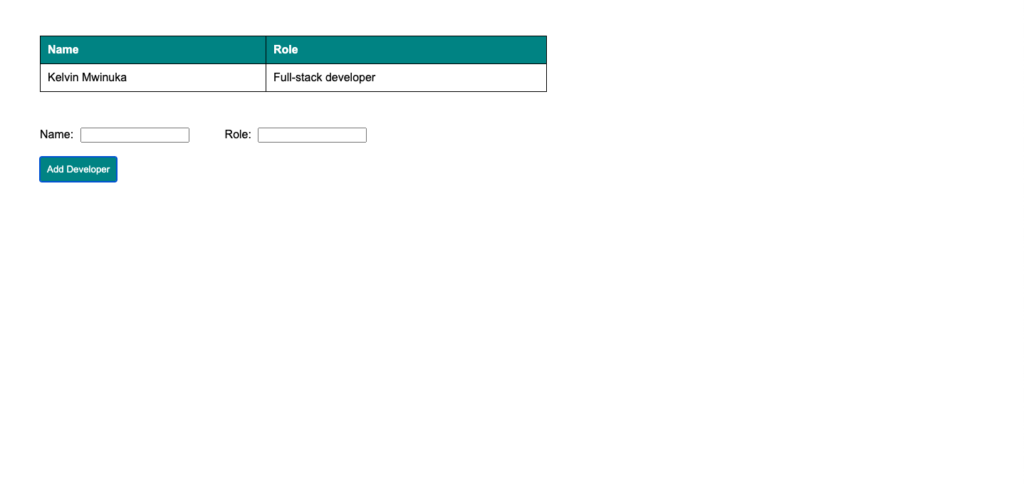
First, let’s create an application that will be our test subject. I’ve created a simple single-page application that contains a form and a table. The form will allow us to input some data that immediately gets displayed in the table upon submission. Here’s how it looks:
This application is created using create-react-app. The application folder will be structured as shown below.
├── e2e
│   ├── custom-environment.js
│   ├── jest.config.js
│   └── tests
│       └── App.test.js
├── package-lock.json
├── package.json
├── public
│   ├── favicon.ico
│   ├── index.html
│   ├── logo192.png
│   ├── logo512.png
│   ├── manifest.json
│   └── robots.txt
└── src
    ├── App.css
    ├── App.js
    ├── DevsTable.js
    ├── Form.js
    ├── index.js
    ├── serviceWorker.js
    └── setupTests.js
I’ve placed the e2e folder in the project root. This is where our puppeteer tests and Jest configurations will live. Other additional files are the DevsTable, and Form components.
In the form component, we accept the user input and pass it to the App component to update its state.
import React from 'react'

const Form = ({ add }) => {

    const handleSubmit = (event) => {
        event.preventDefault();
        let dev = new FormData(event.target)
        add({name: dev.get('name'), role: dev.get('role')})
        event.target.reset()
    }

    return (
        <form onSubmit={handleSubmit} id="devForm">
            <span>Name: </span>
            <input type="text" name="name" required/>
            <span>Role: </span>
            <input type="text" name="role"/><br/>
            <input class="submit" type="submit" value="Add Developer" required/>
        </form>
    )
}

export default Form
The DevsTable component displays a table and maps each object in the devs prop to a row in the table.
import React from 'react';

const DevsTable = (props) => {
    return (
        <table>
            <thead>
                <tr>
                    <th>Name</th>
                    <th>Role</th>
                </tr>
            </thead>
            <tbody>
                {
                    props.devs.map((dev, index) => {
                        return (
                            <tr key={index}>
                                <td id={`name${index}`}>{dev.name}</td>
                                <td id={`role${index}`}>{dev.role}</td>
                            </tr>
                        )
                    })
                }
            </tbody>
        </table>
    )
}

export default DevsTable
Here’s the App component’s code:
import React, { useState, useCallback } from 'react';
import './App.css';
import Form from './Form';
import DevsTable from './DevsTable'

const App = () => {

  const [devs, setDevs] = useState([]);

  const addDeveloper = useCallback((dev) => {
    setDevs(devs => [...devs, dev])
  }, [setDevs])

  return (
    <div className="App">
      <DevsTable devs={devs} />
      <Form add={addDeveloper} />
    </div>
  );
}

export default App;
Finally, the styling in App.css:
.App {
  text-align: left;
  font-family: Arial, Helvetica, sans-serif;
}

table {
  width: 50%;
  margin: 50px;
  border: 1px solid black;
  border-collapse: collapse;
}

th, td {
  padding: 10px;
  border: 1px solid black;
}

th {
  color: white;
  background-color: teal;
}

form {
  margin: 50px;
}

input {
  margin-left: 5px;
  margin-right: 50px;
  margin-bottom: 20px;
}

.submit {
  padding: 10px;
  color: white;
  background-color: teal;
  border-width: 0px;
  border-radius: 5px;
  margin-left: 0px;
}
I usually delete the index.css file and its import statement in index.js. I prefer to have the top-level CSS in App.css.
2. Installing the packages
Before we can start writing the tests, we need to make sure we have the right packages. The first will be the Jest testing framework. When using create-react-app, Jest comes pre-packaged in order to run the default test script. However, we will not be able to use this in the terminal when running our own custom test scripts.
To solve this, we need to add Jest to our devDependencies. If you don’t already have devDependencies in your package.json, add it at the top level. Next, navigate to your node_modules folder and look for the Jest module. Open that module’s package.json and check the version of Jest that’s been pre-packaged by create-react-app.
We want to use the same version of jest in our devDependencies to avoid clashes. Inside devDependencies, add Jest and set the version to the same version installed with create-react-app.
Your devDependencies section should look something like this:
"devDependencies": {
    "jest": "24.9.0"
  }
Now run npm install.
We are going to need 2 more packages for our testing: jest-environment-node and Puppeteer.
jest-environment-node allows us to create a custom environment in which to run our tests(I will explain this in more detail later in the article). Puppeteer is the testing library that provides a high-level API for controlling chromium. At the time of writing, puppeteer only offers chromium support.
We only need these in our dev environment so we will install them with the following command:
npm install jest-environment-node puppeteer --save-dev
Once the installation is done, our devDependencies section should look like this:
"devDependencies": {
    "jest": "24.9.0",
    "jest-environment-node": "^26.0.1",
    "puppeteer": "^4.0.0"
  }
3. Creating the custom test environment
Jest runs tests in environments. The default environment used by Jest is a browser-like environment through jsdom. The environment is created for each test suite. We want to create a custom environment so we can control the test suites’ setup and teardown.
Why is this important? We could just create the browser and page objects in beforeAll and then close them in afterAll, right?
While this would work, it’s not the most efficient solution if we have multiple test suites that use puppeteer. This would lead to typing the same setup and teardown logic multiple times.
Instead, we will create one custom environment, set up and tear down the tests here and then use that custom environment for all our tests.
Here’s how we set up the custom environment:
var NodeEnvironemnt = require('jest-environment-node')
var puppeteer = require('puppeteer')

class CustomEnvironment extends NodeEnvironemnt {
    constructor(config, context){
        super(config, context)
    }

    async setup(){
        await super.setup()
        this.global.browser = await puppeteer.launch({
            headless: false,
            slowMo: 100
        })
        this.global.page = await this.global.browser.newPage()
        await this.global.page.goto('http://localhost:3000/', {waitUntil: 'load'})
    }

    async teardown(){
        await this.global.browser.close()
        await super.teardown()
    }
}

module.exports = CustomEnvironment
In the custom environment, we have access to this.global. This is where you put data that needs to be accessible in the tests.
We set up our browser and page objects in the setup method. This method runs before the test suite is executed. The teardown method runs after all the tests in a suite are complete so its where we close the browser.
4. Configuring Jest
Next, we have to configure Jest. We can do this directly in the project’s package.json with a “jest” object, but I prefer using a config file. Let’s navigate to the jest.config.js inside the e2e folder and add the following code:
module.exports = {
    testEnvironment: './custom-environment.js',
    testTimeout: 60000
}
The testEnvironment option allows us to set a custom environment to be used instead of the default environment. Let’s point it to the custom environment we defined earlier.
The testTimeout option allows us to set the amount of time a test has to run before Jest times out and aborts it. The default is 5 seconds. This is quite short for end-to-end tests as launching the browser and loading pages alone can take a few seconds. I’ve set it to 1 minute here but feel free to adjust this according to your needs.
However, it’s important to set a timeout that’s not too long either. One of the criteria to test for is performance. It’s not beneficial to simply adjust your tests to tolerate extremely slow loading times as that’s a sign that your application can be optimised.
Next, we have to create a command to run our tests. In the scripts section inside the package.json, let’s add the following line:
"test:e2e": "jest -c e2e/jest.config.js"
This sets the Jest terminal command that will be run. We also set the configuration file here. Now, all we have to do to run the tests is use the npm run test:e2e command in the terminal.
5. Writing the tests
Finally, we can write the tests! Let’s navigate to e2e/tests/App.test.js and define the test suite. Inside the test suite, we’re exposed to the global object which contains the browser and page objects we created in the custom environment.
Here, I’ve written a simple test that fills the form 3 times with 3 sets of data, and then iterates through the table rows to check if the data is being displayed as expected.
describe('App tests',() => {

  let page = global.page

  test('Loads all elements', async () => {

    const testData = [
      { name: 'Kelvin Mwinuka', role: 'Front-end developer' },
      { name: 'James Mitchel', role: 'Back-end developer' },
      { name: 'Michael Scott', role: 'DevOps' }
    ]

    await page.waitForFunction('document.getElementById("devForm")')

    // Input all the data
    for(let i = 0; i < testData.length; i++){
      await page.type("input[name='name']", testData[i].name)
      await page.type("input[name='role']", testData[i],role)
      await page.click("input[type='submit']")
    }

    // Check if all the data is represented in the table
    for(let i = 0; i < testData.length; i++){
      expect(await page.$eval(`#name${i}`, element => element.innerText))
      .toEqual(testData[i].name)
      expect(await page.$eval(`#role${i}`, element => element.innerText))
      .toEqual(testData[i].role)
    }
  });
})
6. Considerations
There are several improvements we can make for a better testing experience.
1. Dev server
At the moment, we need the application to already be running before we can run our tests. We can improve this by employing the help of jest-dev-server. First let’s install it in our devDependencies npm install jest-dev-server --save-dev
Now let’s create a global-setup.js file in our e2e folder with the following contents:
const { setup: setupDevServer } = require("jest-dev-server")

module.exports = async () => {
    await setupDevServer({
        command: 'npm run start --port 3000',
        launchTimeout: 30000,
        debug: true,
        port: 3000
    })
}
This file starts the server upon setting up our test. Next, let’s create a global-teardown.js file in the same directory with the following content:
const { teardown: teardownDevServer } = require("jest-dev-server")

module.exports = async () => {
    await teardownDevServer()
}
This will shutdown the dev server once the tests have finished executing. In order for jest to run these setup and teardown functions, we must update the jest.config.js file to this:
module.exports = {
    testEnvironment: './custom-environment.js',
    testTimeout: 60000,
    globalSetup: './global-setup.js',
    globalTeardown: './global-teardown.js'
}
It’s important to note that the setup and teardown methods in custom environment run once before and after EACH test suite respectively. The globalSetup and globalTeardown function run before and after ALL tests suites respectively.
Also, note that the global variables set in globalSetup can only be accessed in globalTeardown and cannot be accessed inside the test suites unlike the global variables set in the custom environment.
2. Tests with login
If you have multiple test suites which create user sessions, you’ll want to make sure they are queued to run consecutively. By default, Jest will run test suites concurrently.
The issue arises when one suite logs in and essentially kicks another suite out of its session. To prevent this, limit the max workers to 1 in the jest command by updating the script in package.json to the following:
"test:e2e": "jest -c e2e/jest.config.js --maxWorkers=1"
This will make sure only one test suite is run at a time. Do note that this will increase the total execution time.
3. Mocking requests
If you want to avoid the above problem entirely, it’s advisable to mock requests in your tests. This has multiple advantages including but not limited to:
- Reducing test execution time as no real network calls are made
- Having full control over responses when testing for various response scenarios
- Not being at the mercy of the back-end server when running tests
Here’s a library that provides puppeteer request mocking functionality along with concise documentation.