In the last article, we leveraged AWS Cognito to handle user authentication in our application. There was a caveat with the setup, email sharing was allowed.
We want to make sure that we only have one user per email. We could build this logic into the sign-up handler in our app's backend but there are a couple of reasons why it's not the best practice.
- The validation will only live in this particular backend. If we create another app that interacts with the same user pool, we will have to repeat this logic there too.
- We're adding bloat to the request handler, we could keep this handler clean by avoiding unnecessary code if we can.
Enter Cognito user pool triggers. We'll specifically look at the pre-signup trigger. This trigger is executed before Cognito's own signup validation with a couple of notable advantages:
- We can add custom validation when registering a new user to the user pool. In our case, it's to check if the submitted email is already in use.
- The logic is baked into the user pool. Any signup event for this user pool will be validated regardless of where it's coming from.
Implementation
Lambda
Make sure that the lambda is in the same region as the user pool. The following is the lambda's code:
const { CognitoIdentityProviderClient, ListUsersCommand } = require("@aws-sdk/client-cognito-identity-provider");

exports.handler = async (event, context, callback) => {
    // TODO implement
    const params = {
        UserPoolId: 'us-west-2_rxOJKcUKc',
        Filter: `email = "${event.request.userAttributes.email}"`
    };

    const client = new CognitoIdentityProviderClient();
    const listUsersCommand = new ListUsersCommand(params);

    const data = await client.send(listUsersCommand);

    if (data?.Users?.length > 0) {
        callback(new Error("Email is already taken"), event);
    } else {
        callback(null, event);
    }

};
Before we link this lambda to the user pool, we need to make sure it runs properly. In this example, I'm using the JavaScript v3 SDK. If we try to run this, the @aws-sdk/client-cognito-identity-provider module will not be found.
Layer
This section is only applicable if you're using the v3 SDK at the time of writing this article. If you're not using the v3 SDK, you can skip ahead to the permissions section.
We need to create a lambda layer containing this package so we can use it in the lambda.
Create a new project in your development environment. Navigate to the folder and run npm init.
Complete the setup process and then run npm install @aws-sdk/client-cognito-identity-provider to install the package.
Open the package.json file and add the following line to the scripts section:
{
  ...
  "scripts": {
    ...
    "build": "rm -rf nodejs && rm cognito-base-layer.zip && npm install && mkdir nodejs && mv node_modules nodejs && zip -r cognito-base-layer.zip . && cp cognito-base-layer.zip ~/Downloads"
  },
  ...
}
This is the build script for the layer. It does the following:
- Delete the previous nodejs directory and cognito-base-layer.zip file from the previous build.
- Install the packages.
- Create a directory called
nodejs. - Move the
node_modulesfolder intonodejs. - Zip the current directory into a zip file called
cognito-base-layer.zip. - Copy the zip file to the desired location (Optional).
If you're wondering why we move the node_modules to a subfolder, this is where the lambda will look for the installed packages. If you only have node_modules at the root, your packages will not be found.
When you're ready, run npm run build. A new zip file will be created. Now that we have the zip file, let's create a layer:
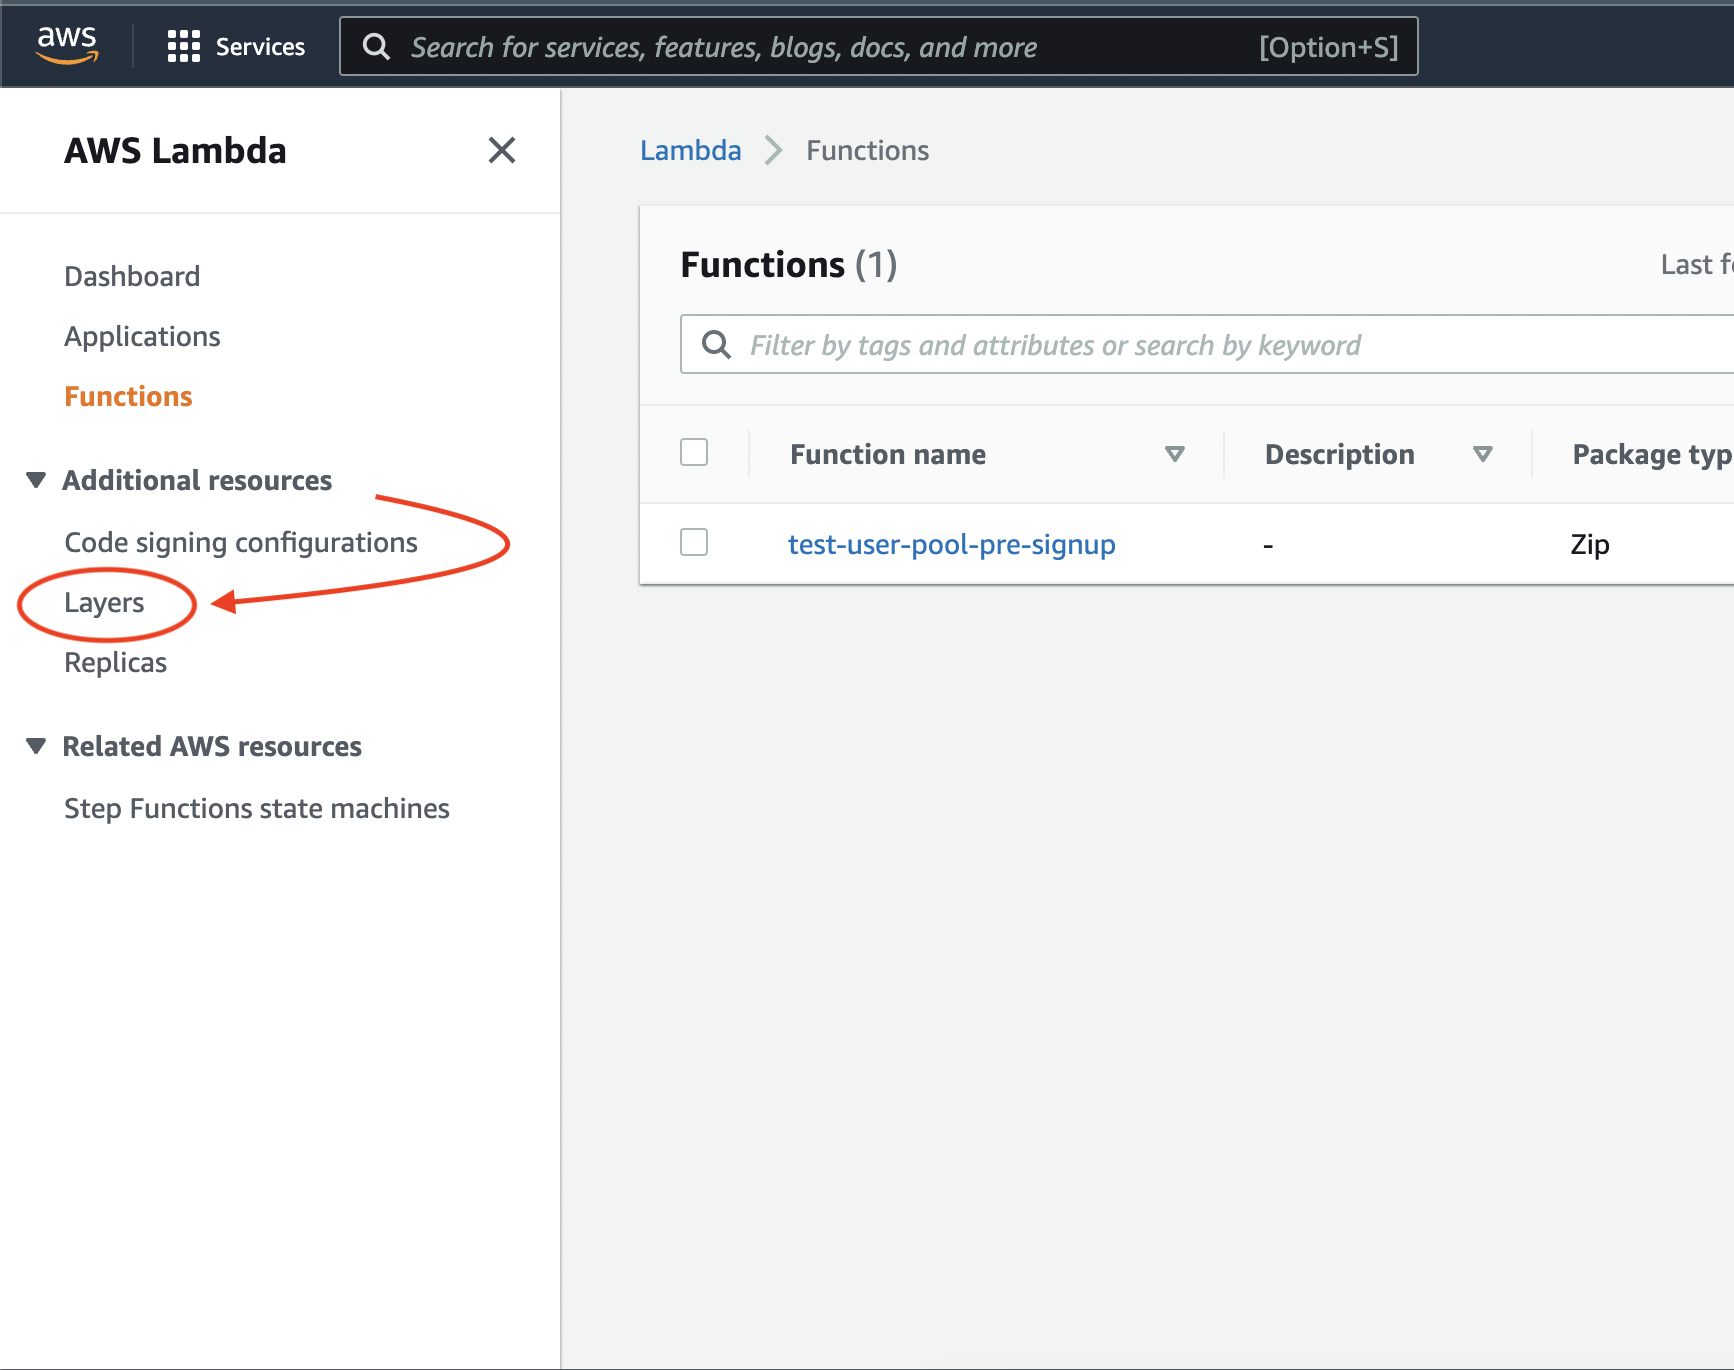
Go to the lambda service and click on Layers
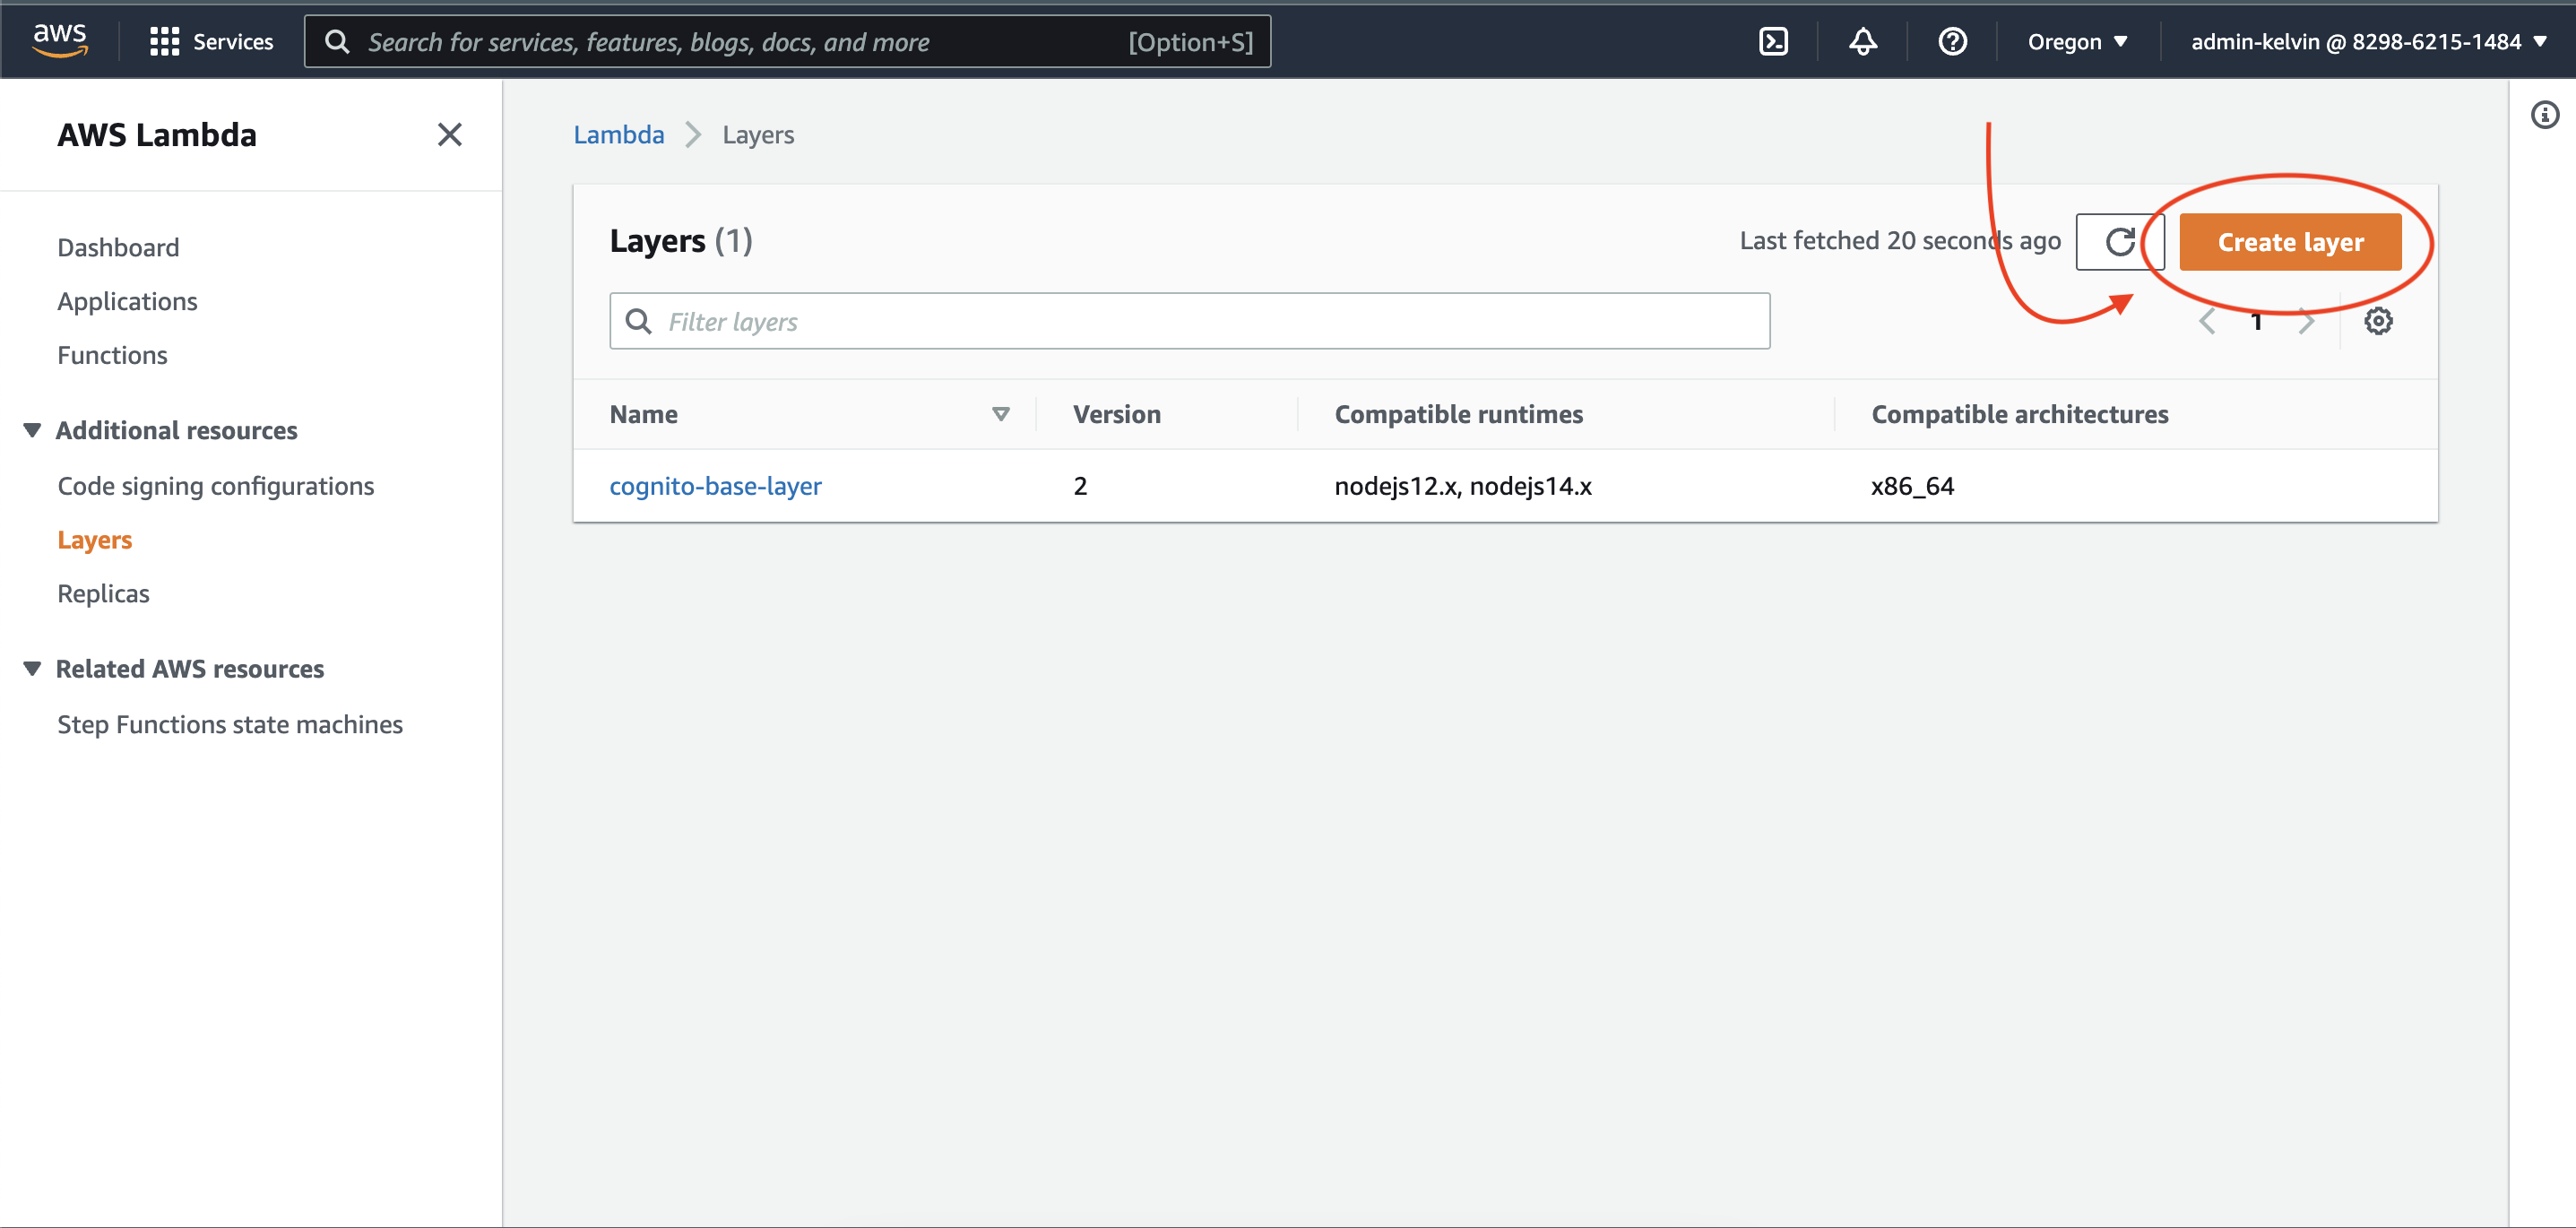
Click on "Create layer"
Fill in the layer details:
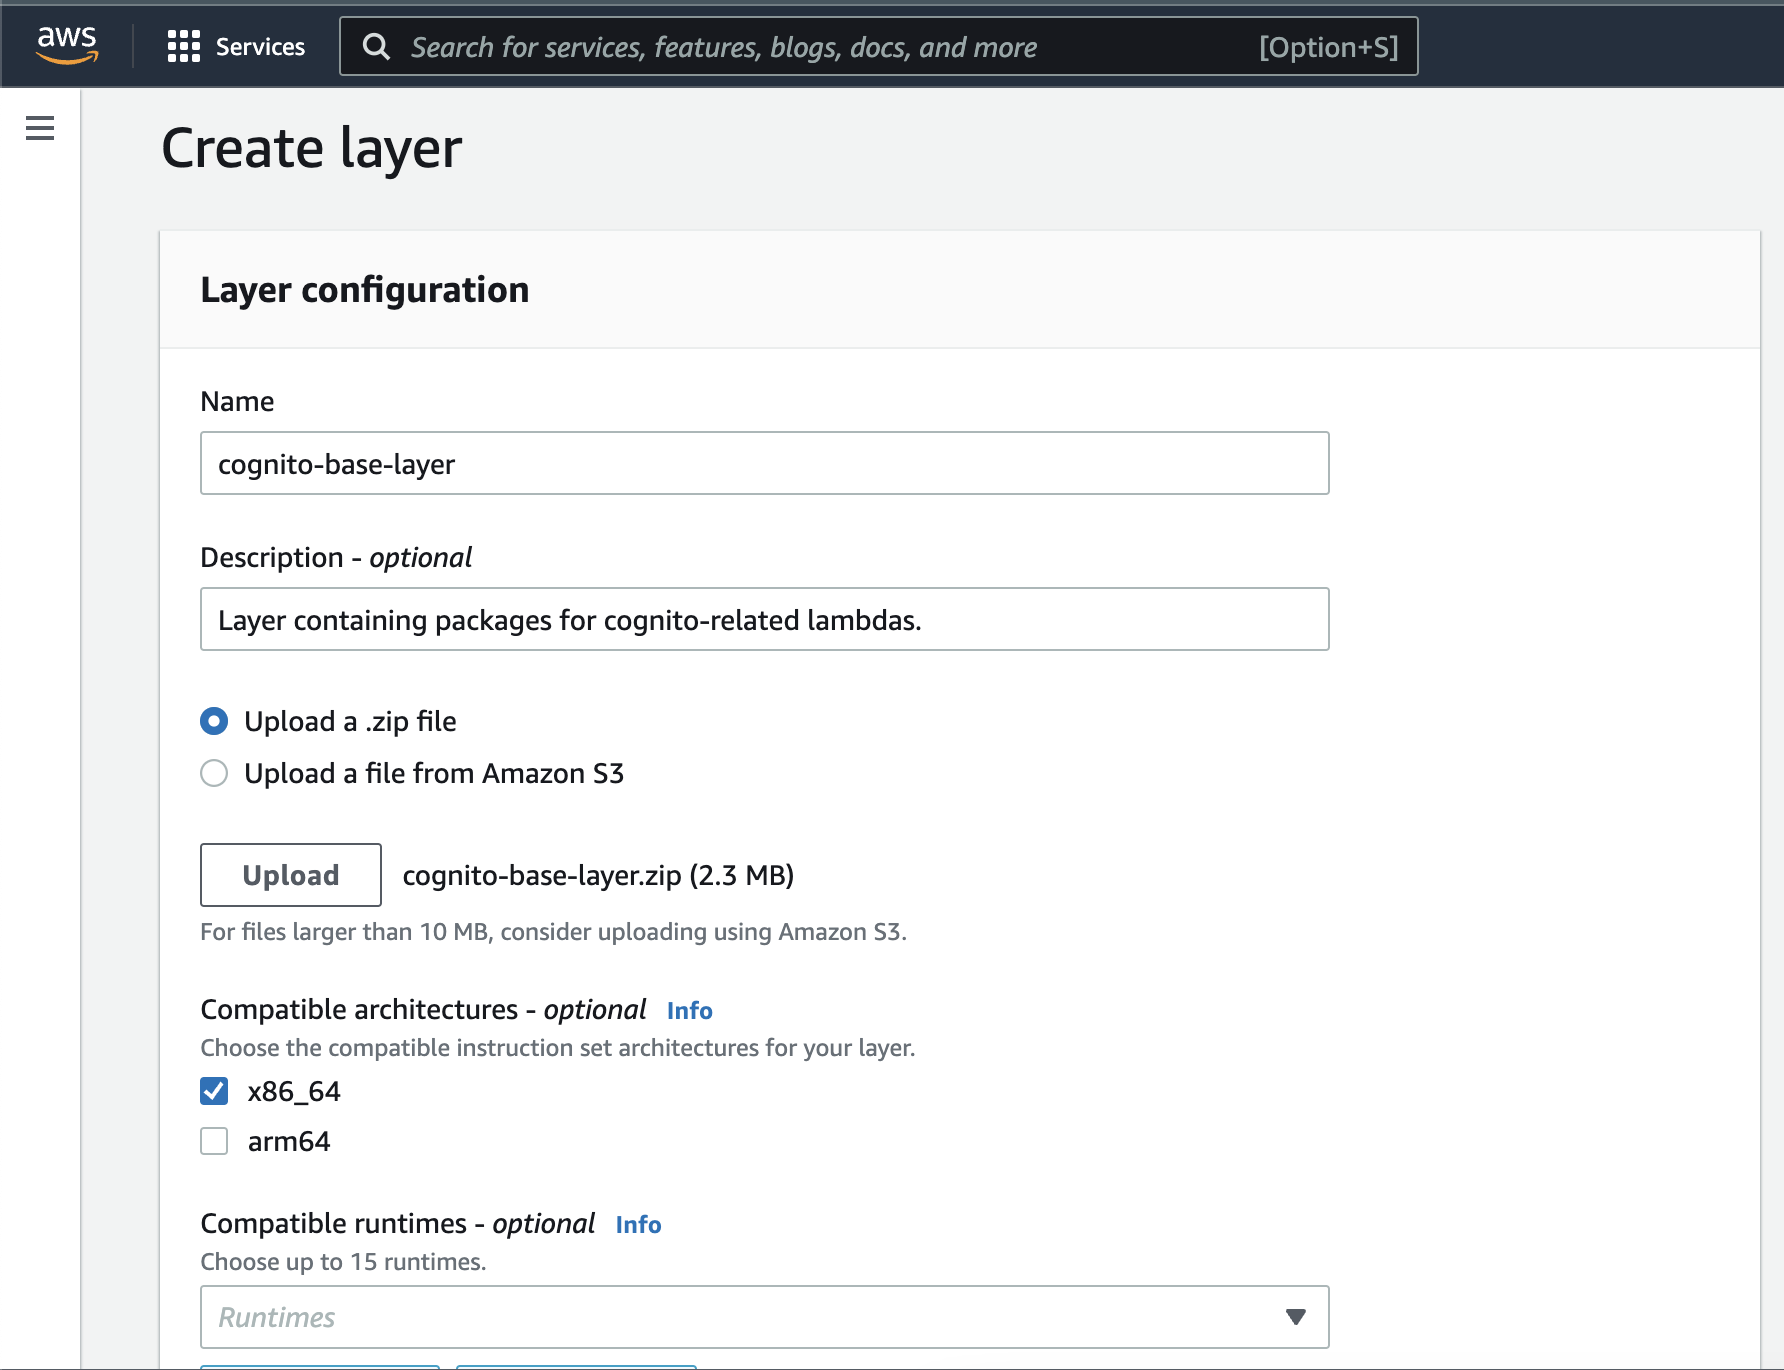
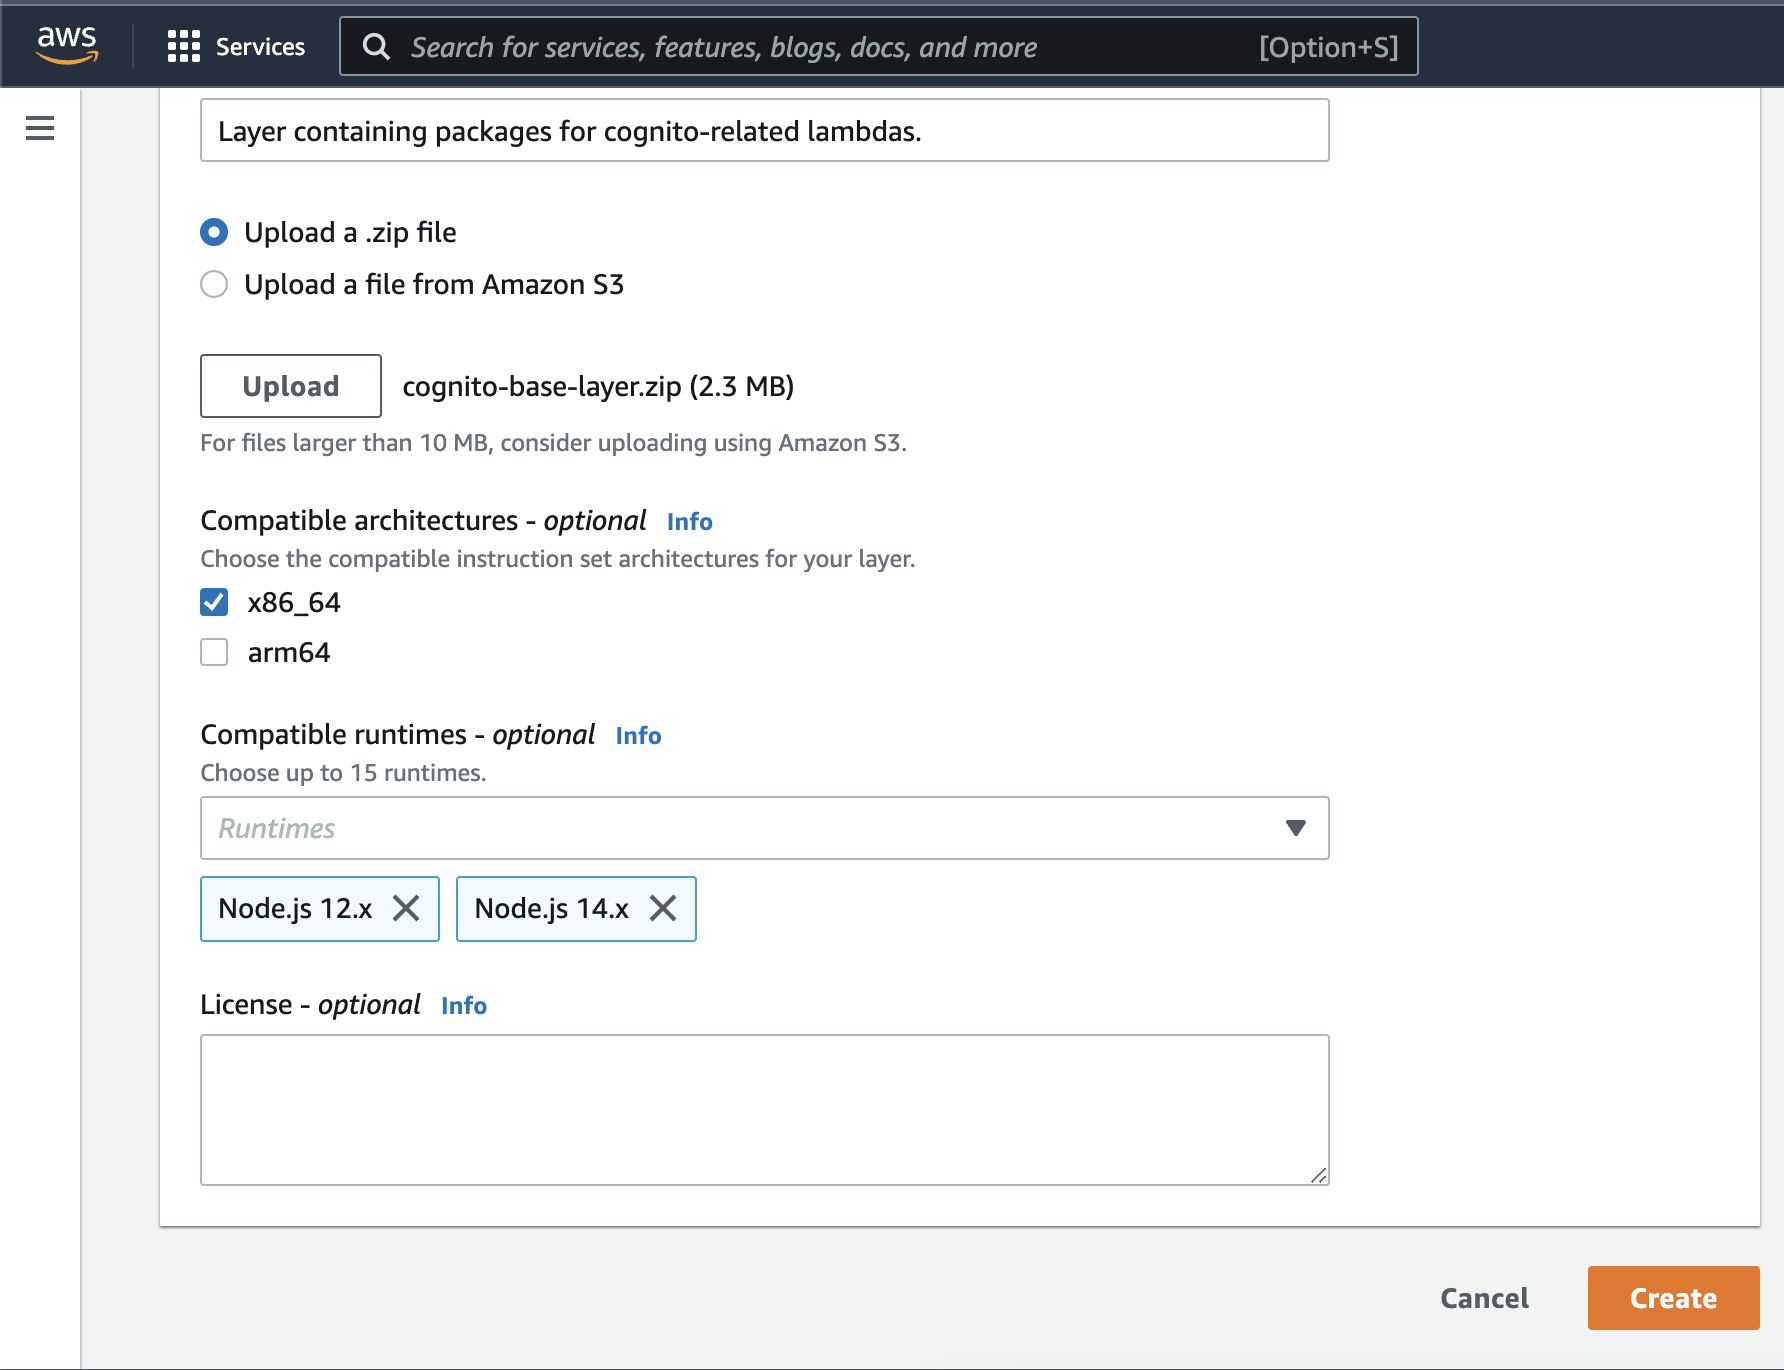
Name the layer whatever you like. In the upload section, upload the zip file that was generated in the previous build.
In the "compatible architectures" section, make sure to select the same architecture that your lambda is based on. In my case, it's x86_64.
When you're done click "Create".
Let's add this layer to the lambda to allow it to make use of the package(s) in the layer.
Navigate to the lambda function and click on Layers:
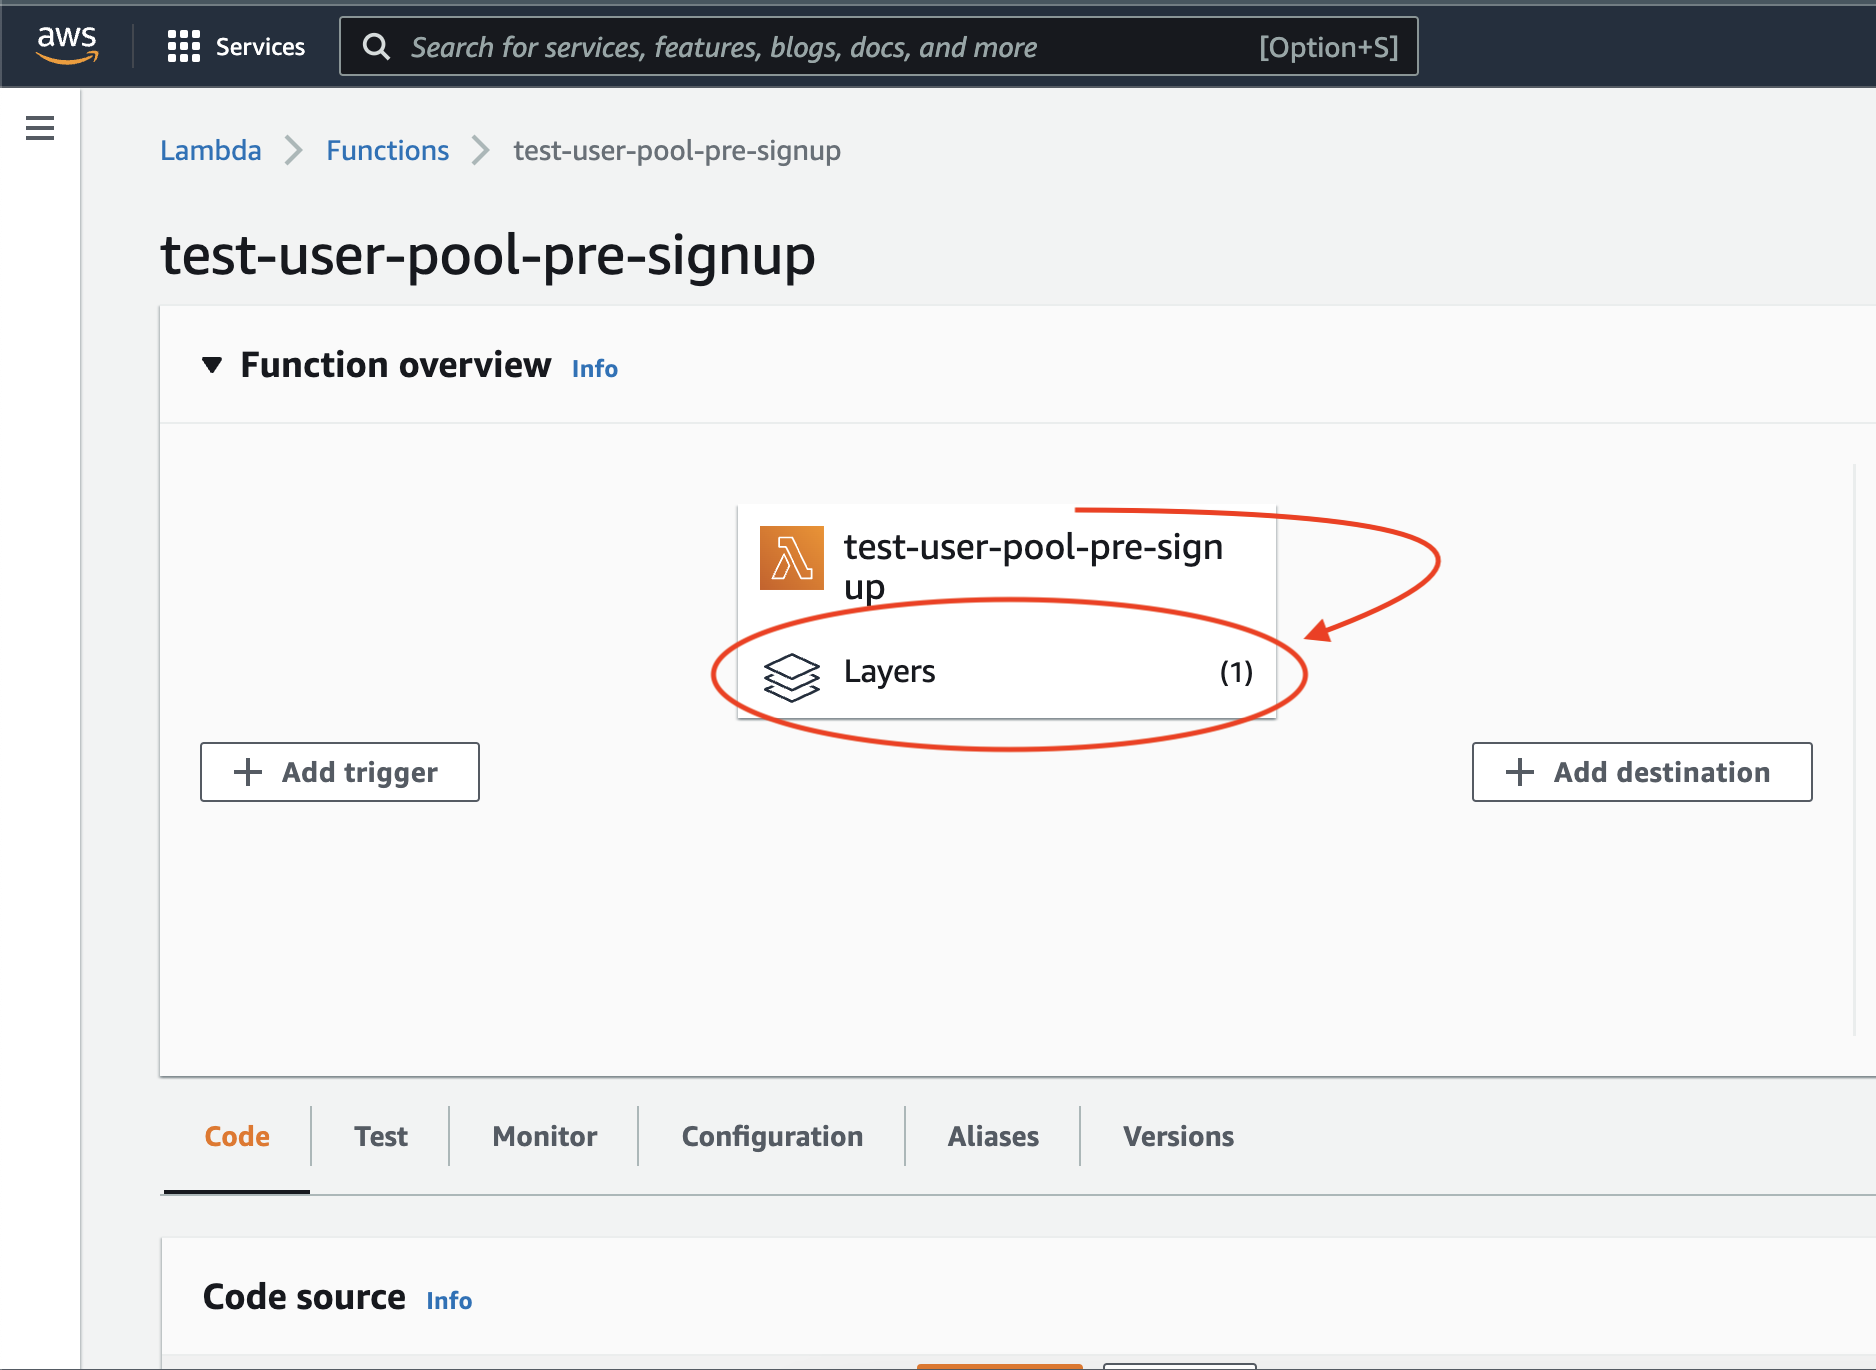
Click on Add a layer.
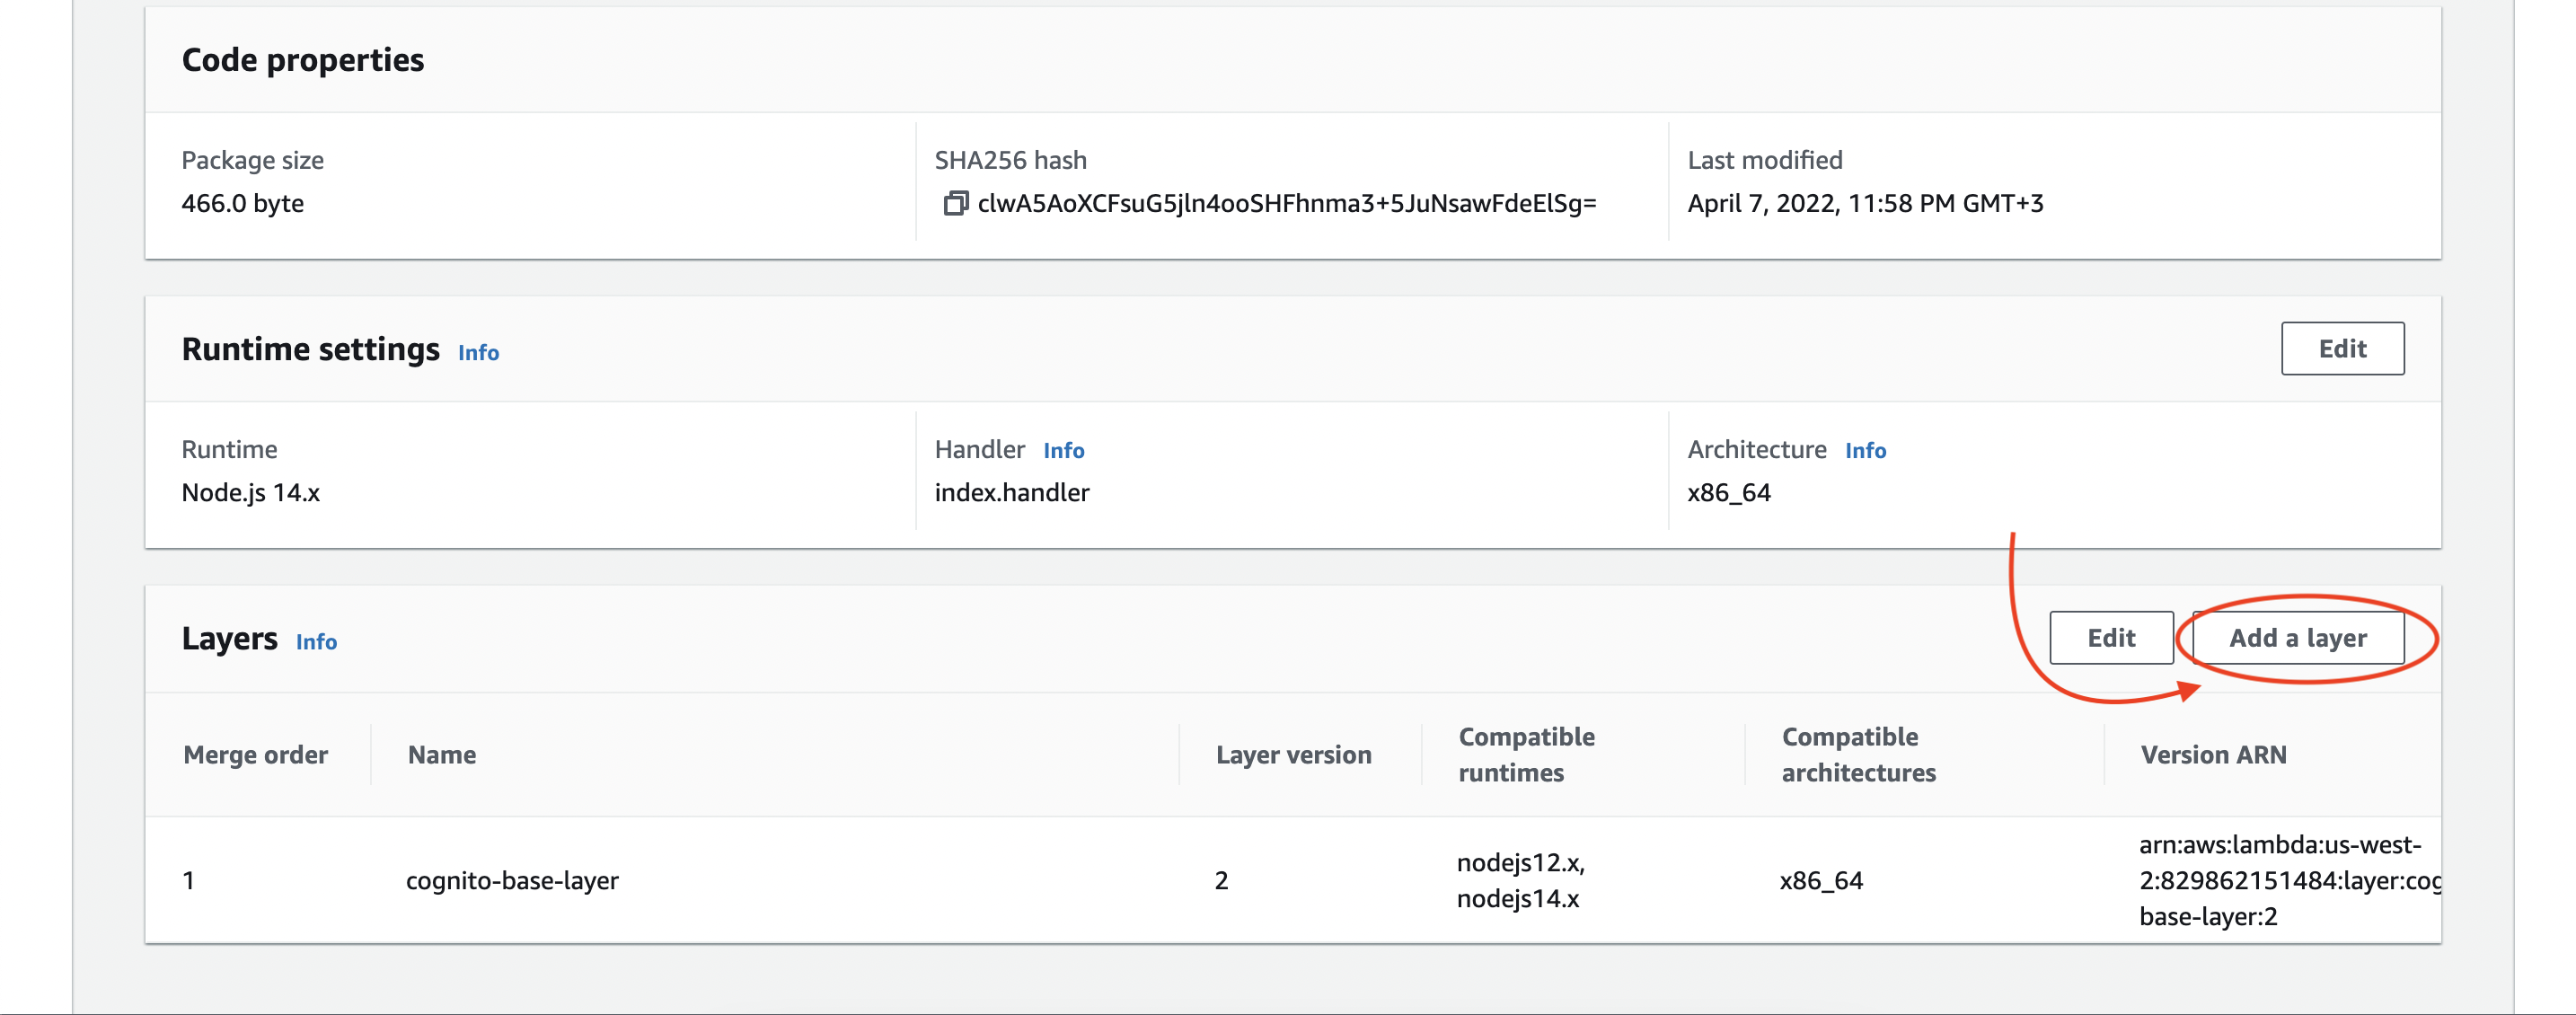
Fill in the layer details:
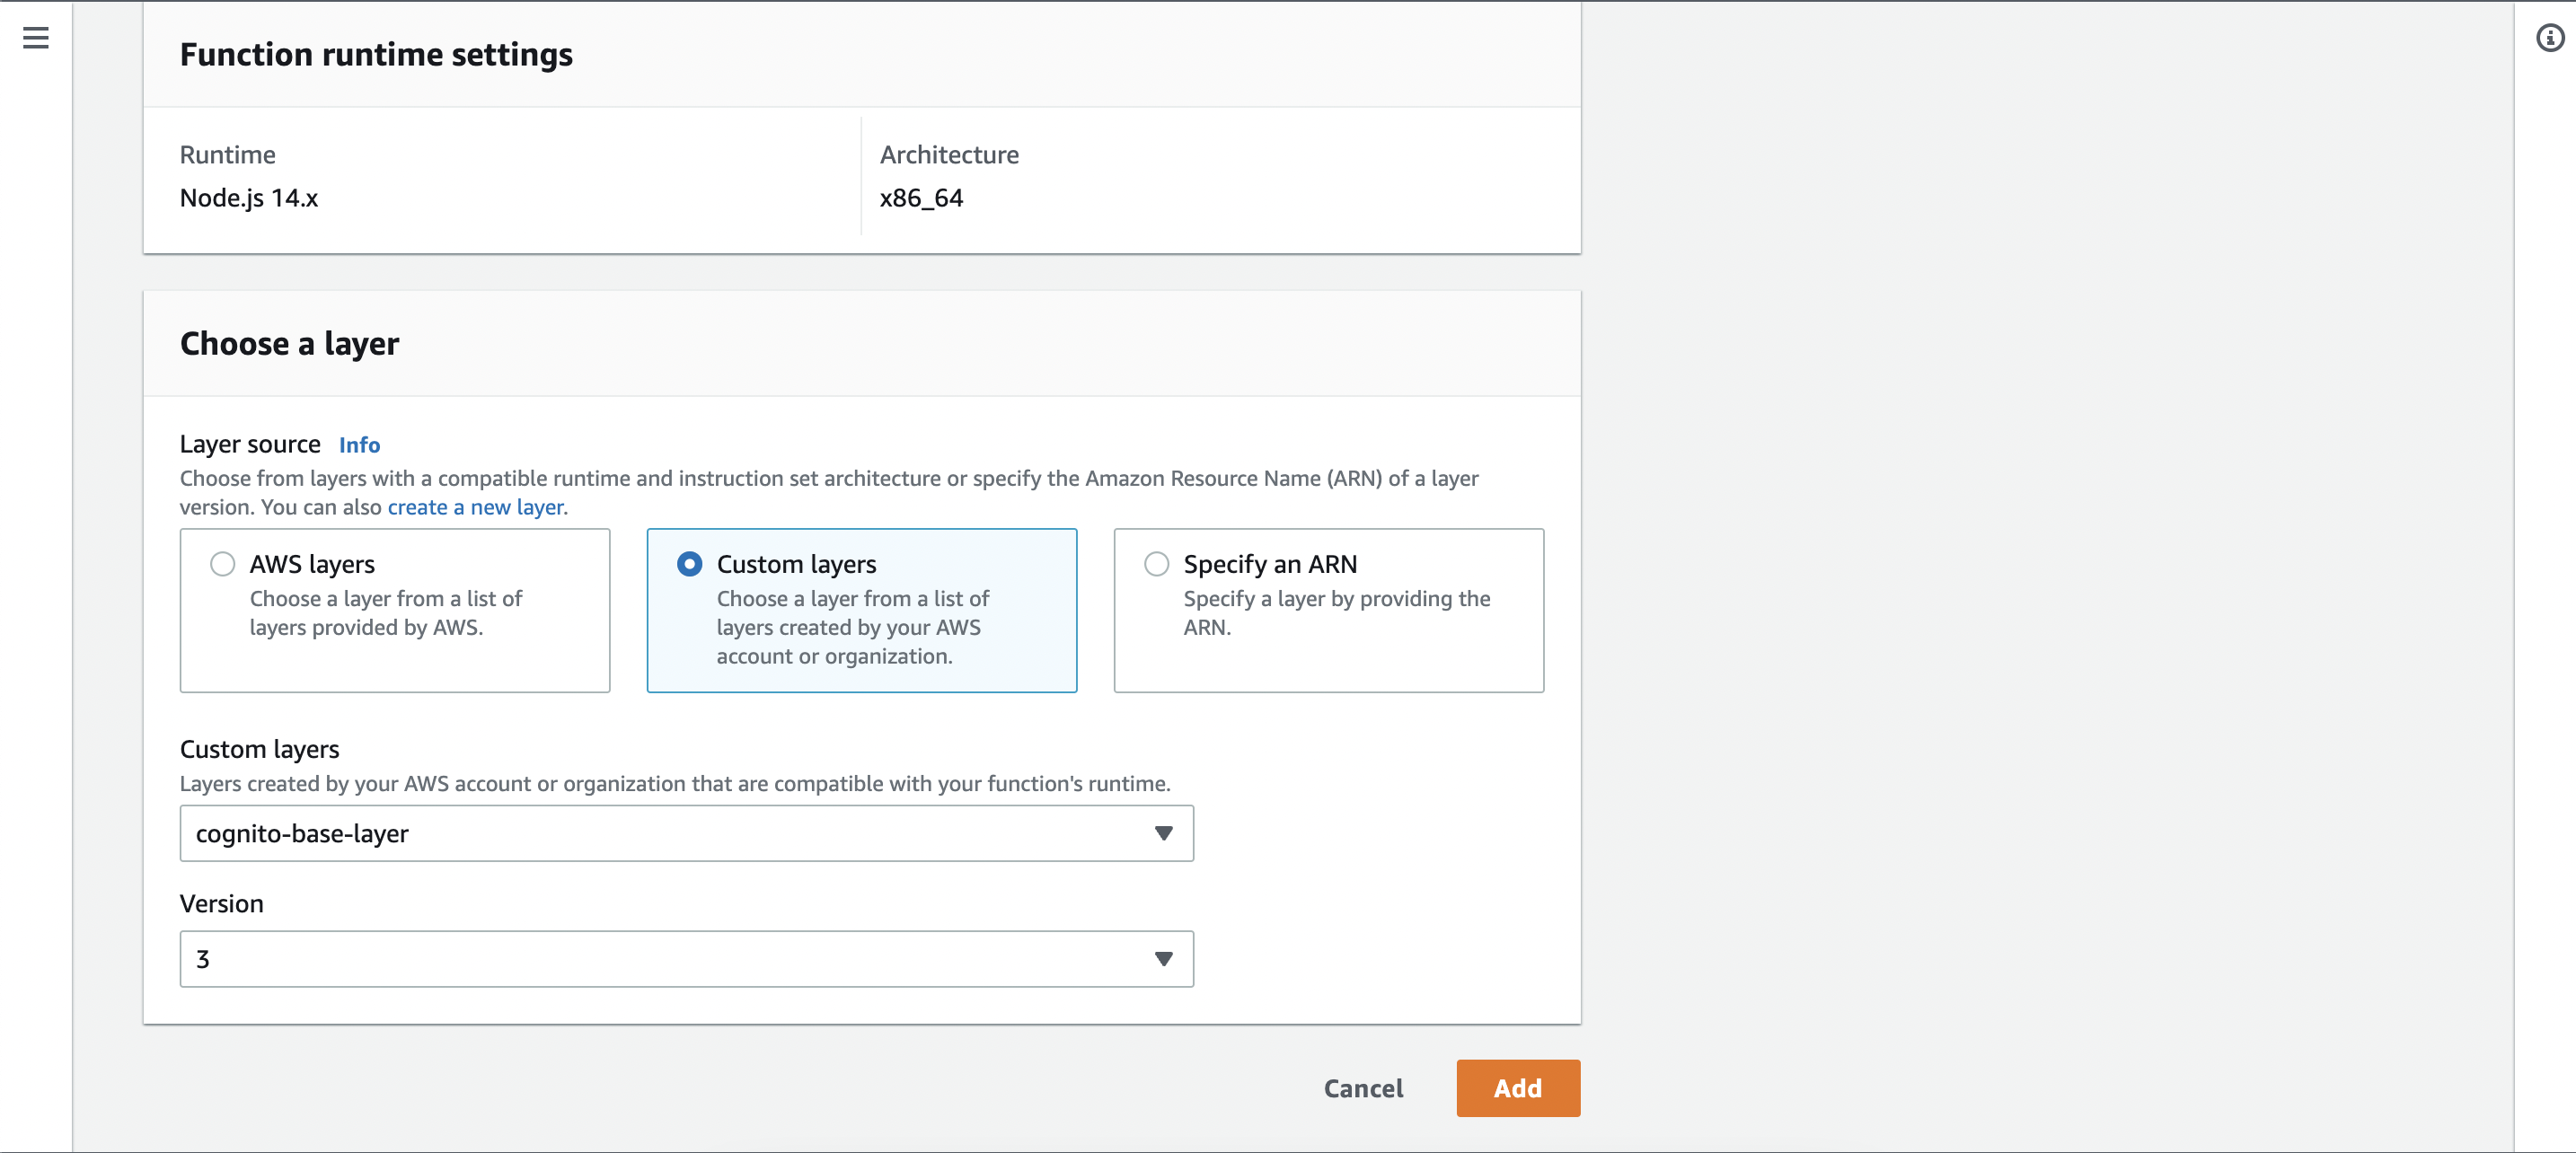
For the layer source, select Custom layers. In the custom layers dropdown menu, select the layer you just created. Once selected, you'll have the option to select a layer version.
Every time you make another upload on a layer, a new version is created and the old version is kept. This is to prevent breaking lambda functions that depend on the current version as each lambda has to specify which layer version they depend on.
Once you're done, click "Add".
That's it on layers, now our lambda can make use of the AWS JavaScript v3 SDK.
Permissions
We're not done yet. This lambda currently doesn't have the correct permissions to list users from a Cognito user pool. Let's grant the correct permissions to the lambda function. First, take note of the lambda function's role.
You can find this in the Configuration tab of the lambda function:
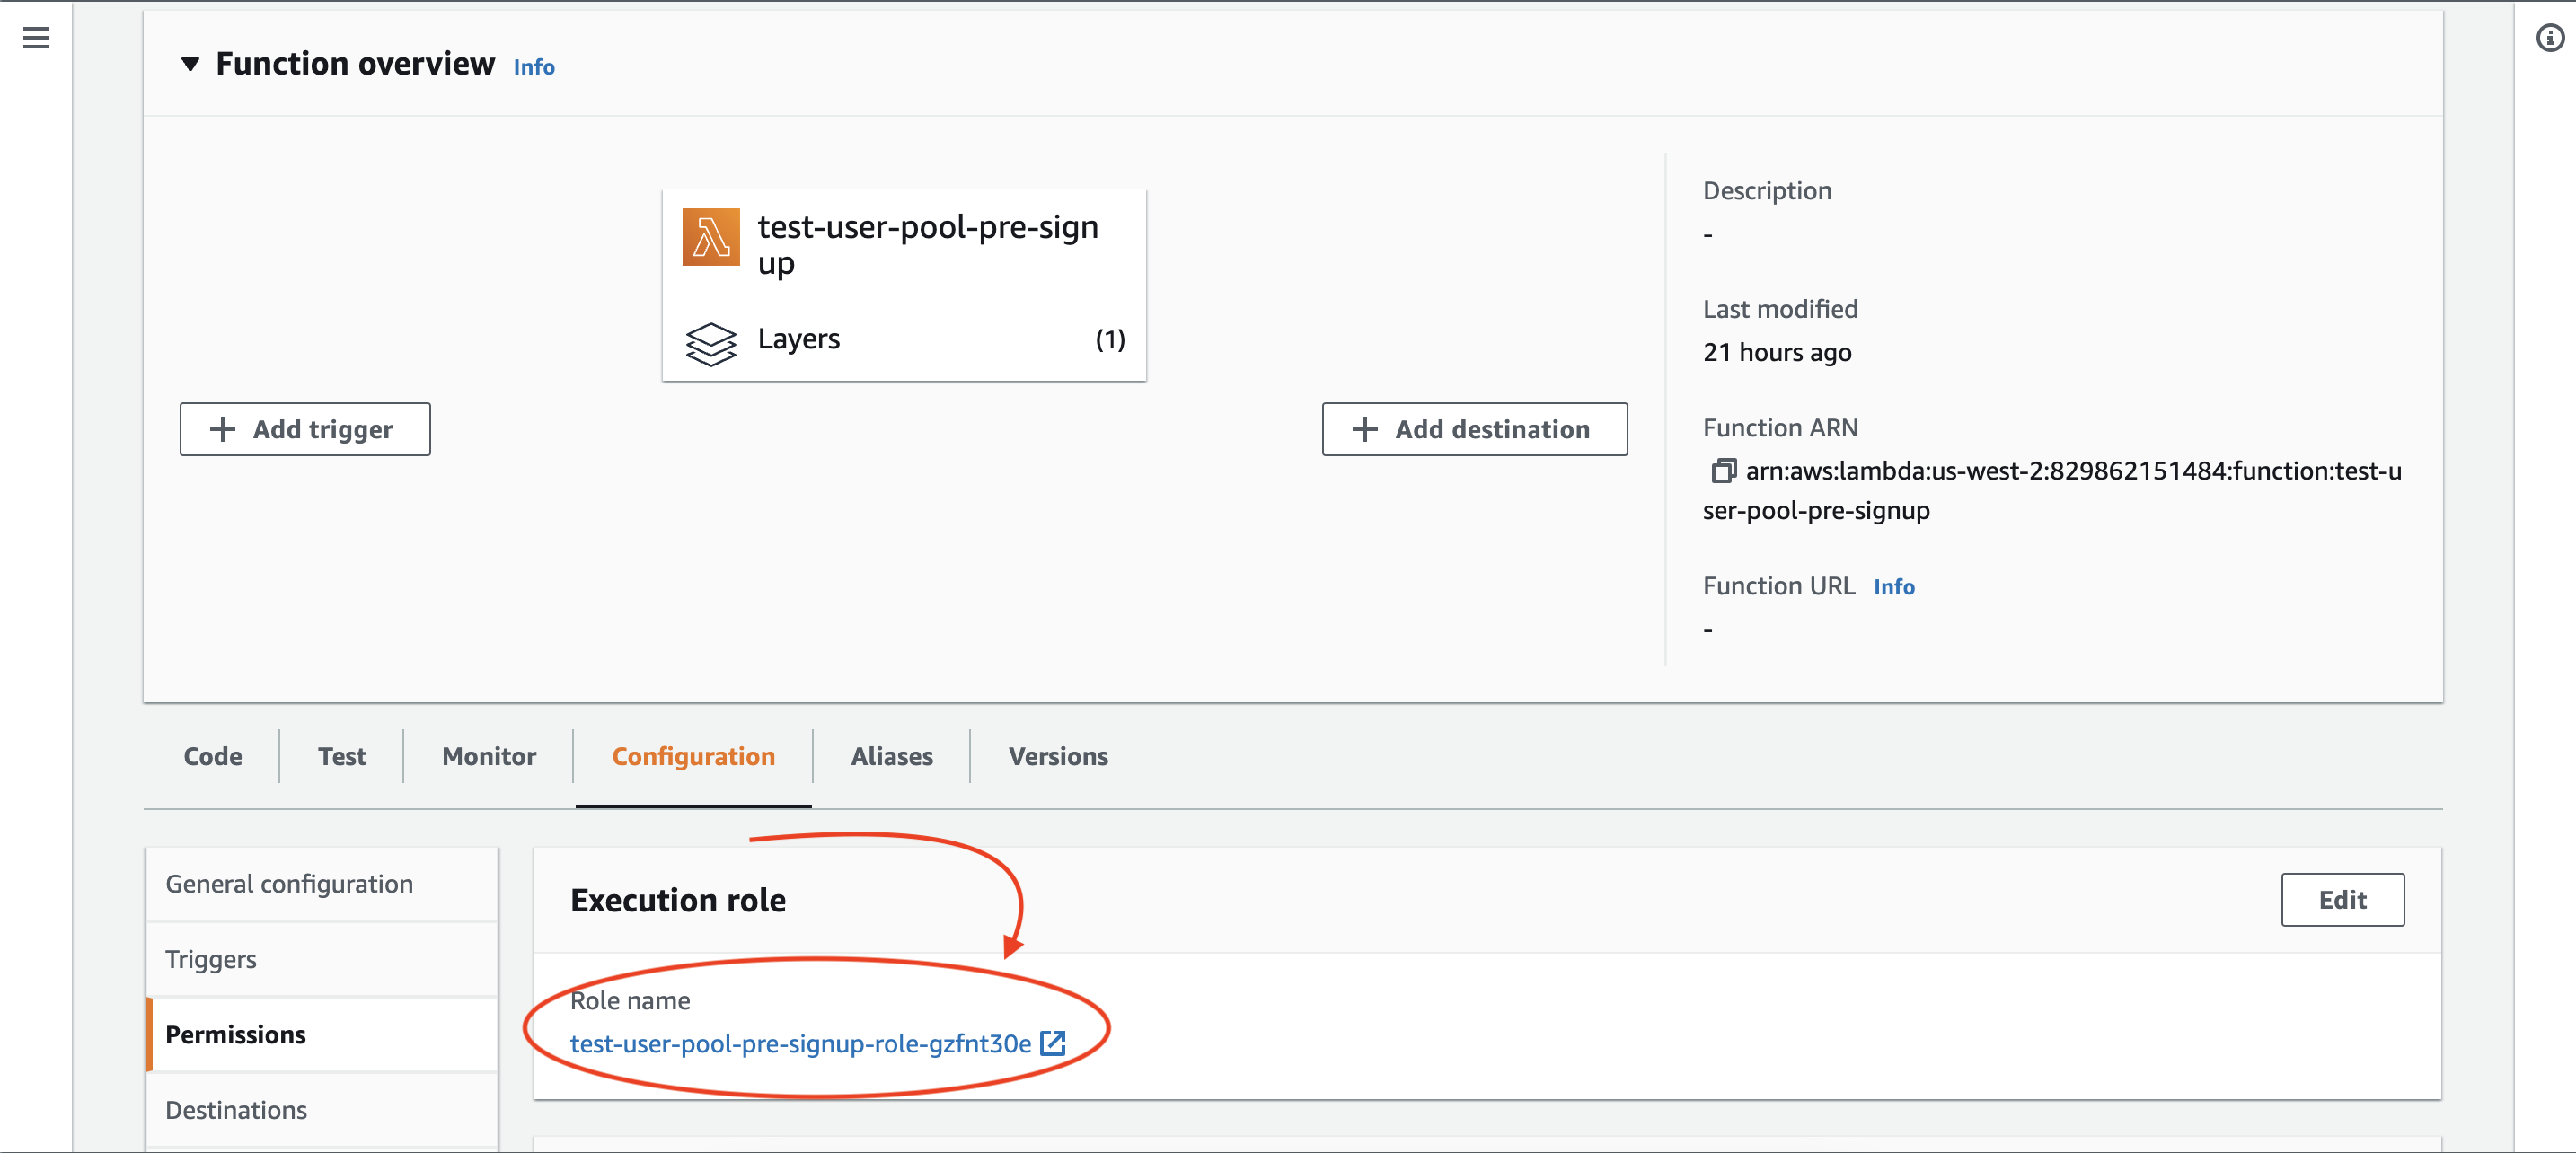
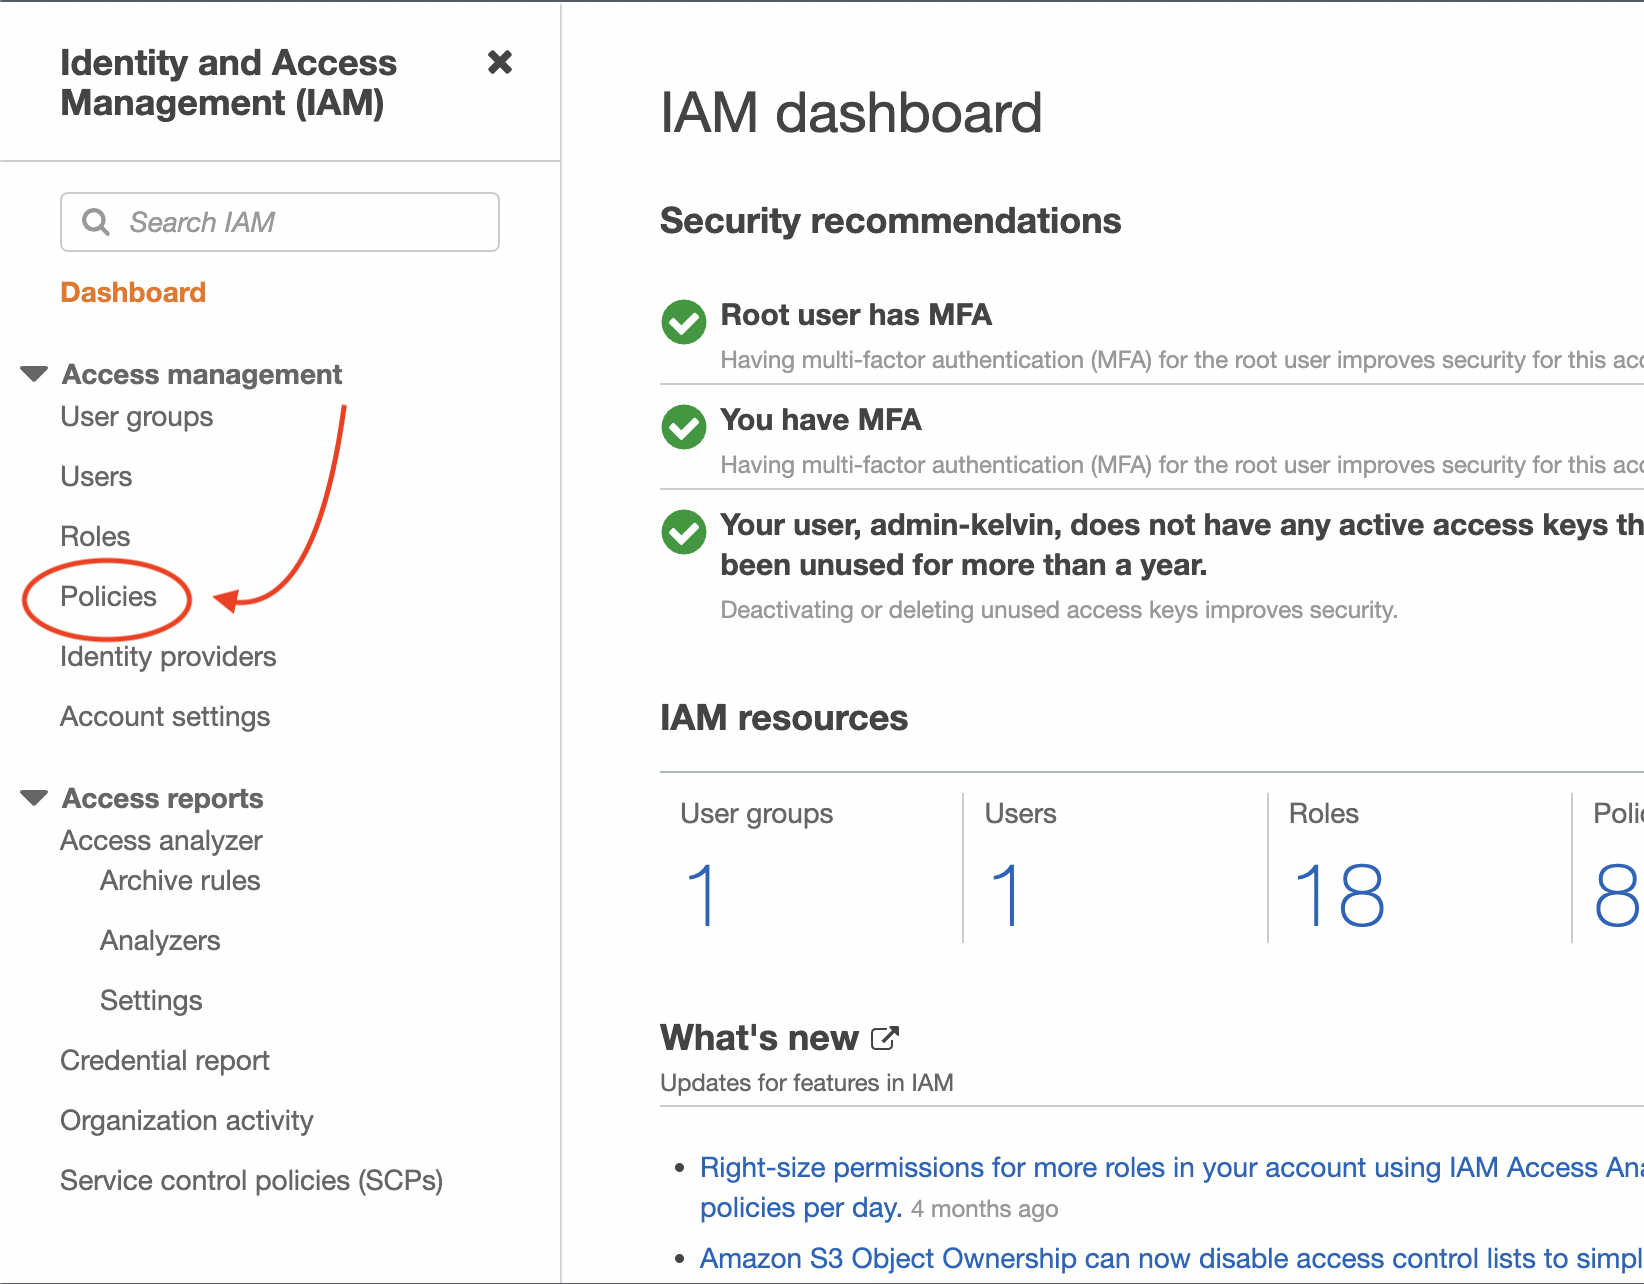
Navigate to the IAM Management Console and click on the Policies tab:
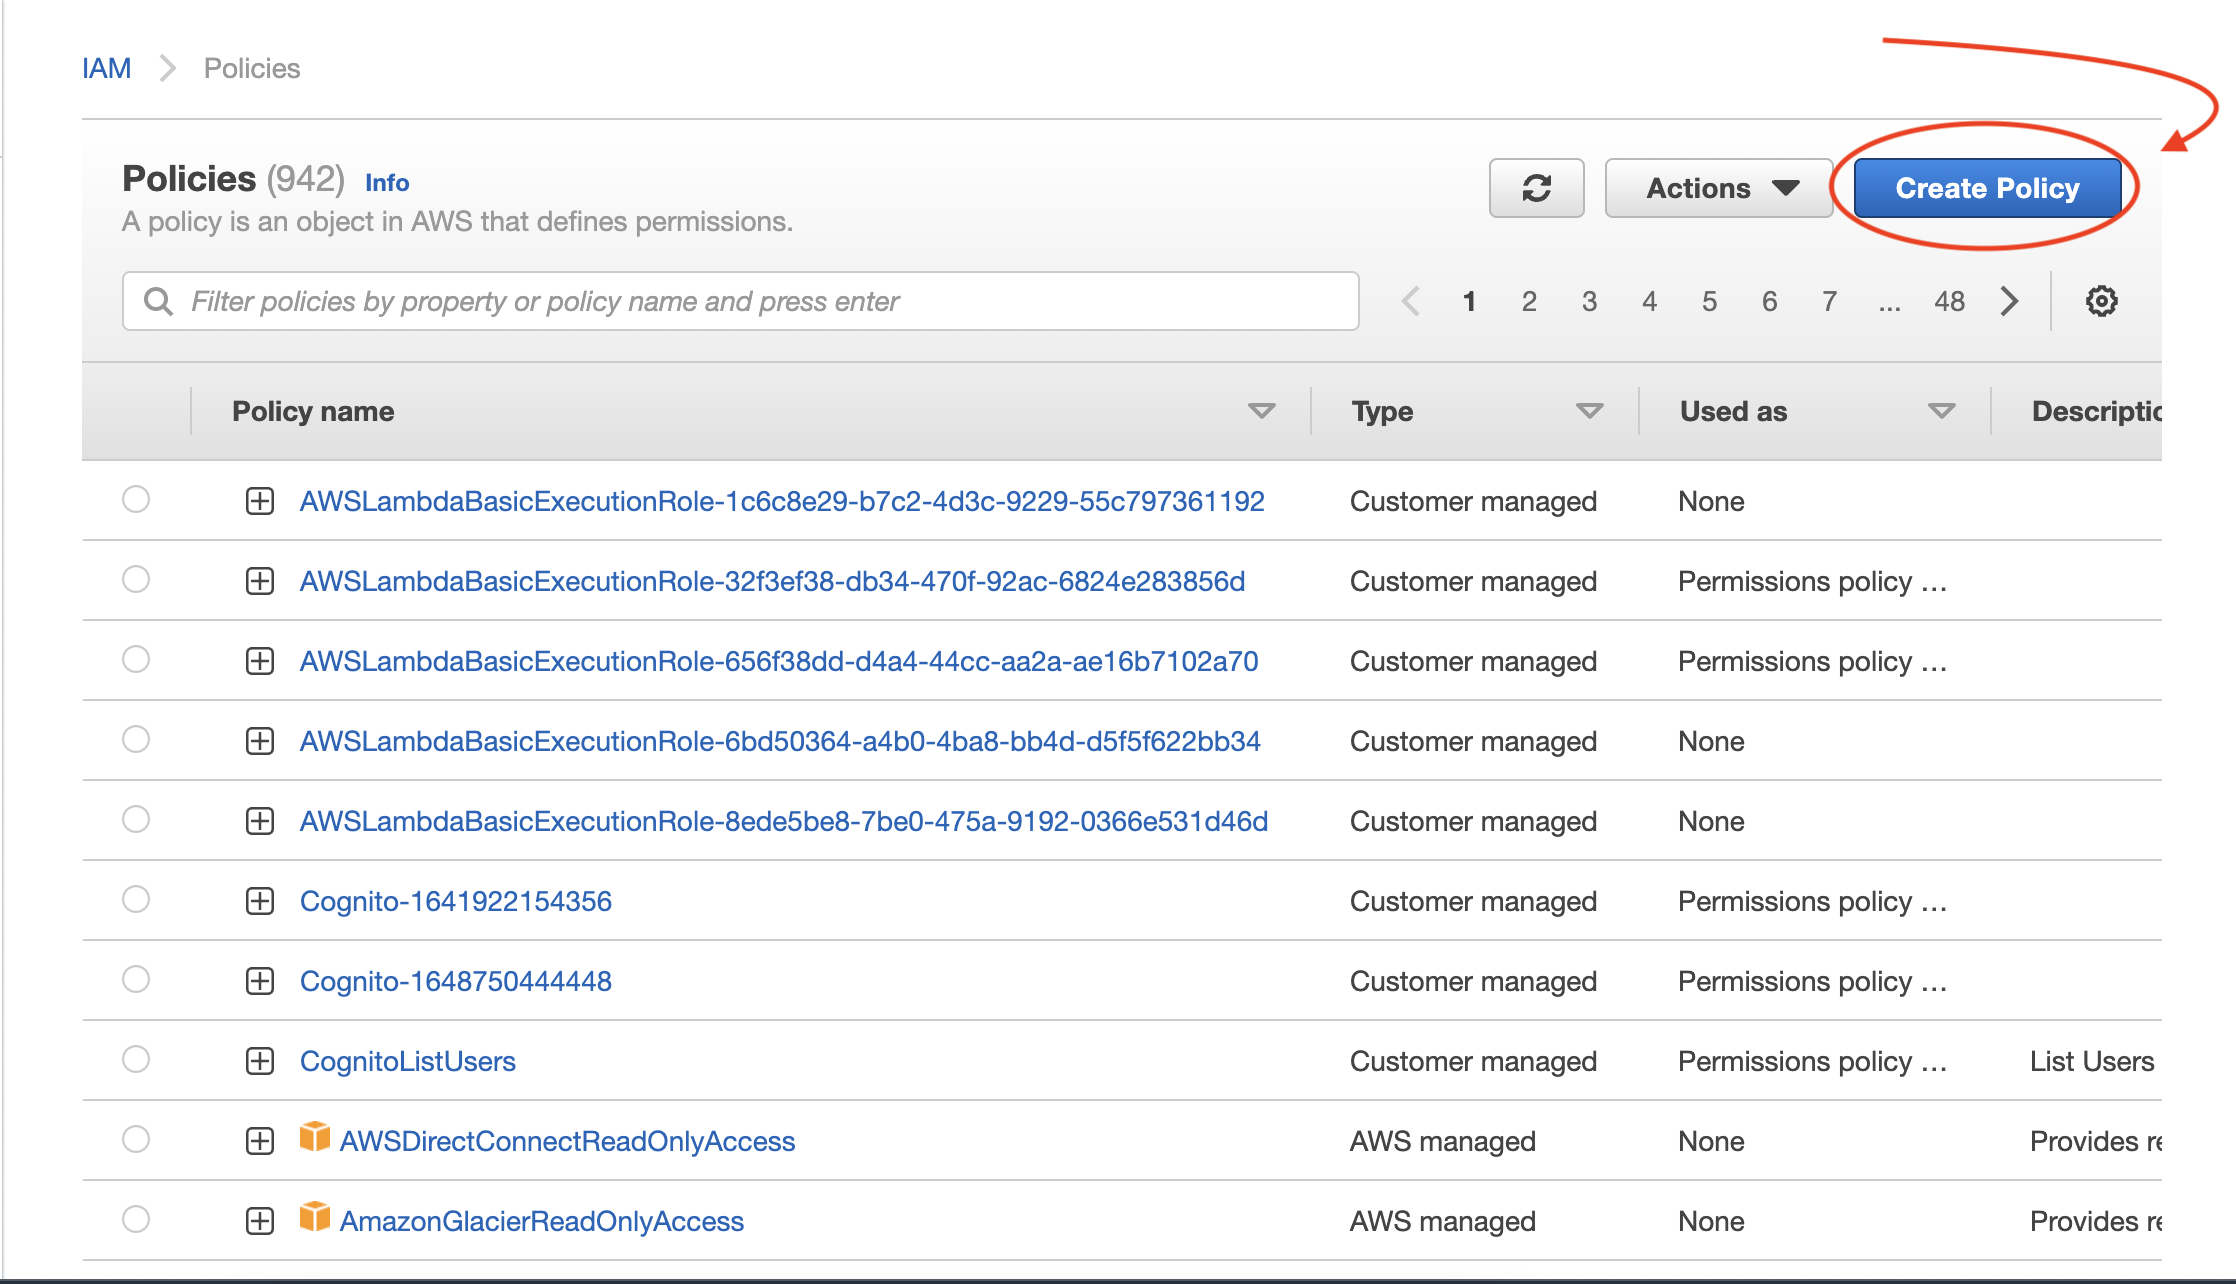
Click on "Create Policy":
Click on the JSON tab and you should see a template like this:
{
    "Version": "2012-10-17",
    "Statement": []
}
In the statement array add the following code:
{
    "Effect": "Allow",
    "Action": "cognito-idp:ListUsers",
    "Resource": "arn:aws:cognito-idp:<region>:<account_id>:userpool/<userpool_id>"
}
The above policy statement allows us to list users from the specified Cognito user pool. Replace the Resource value with your user pool's ARN.
Now let's attach this policy to the lambda's role in order to allow the lambda to make use of it.
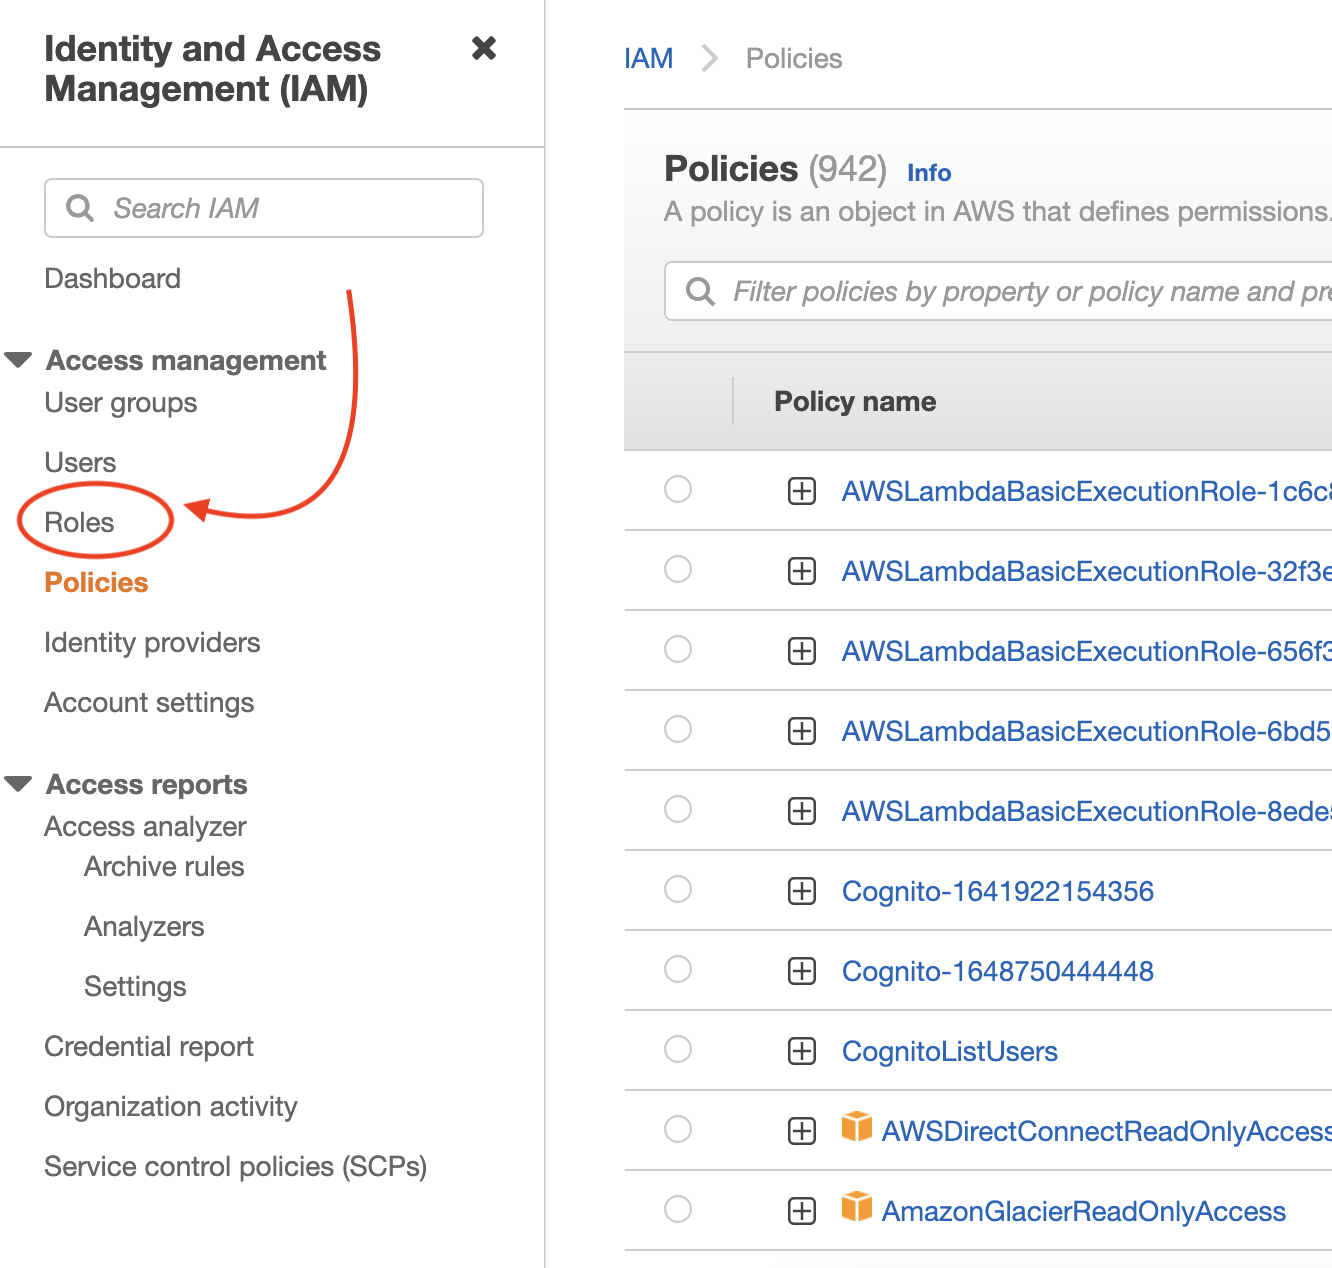
Navigate to "Roles" in the IAM Management Console:
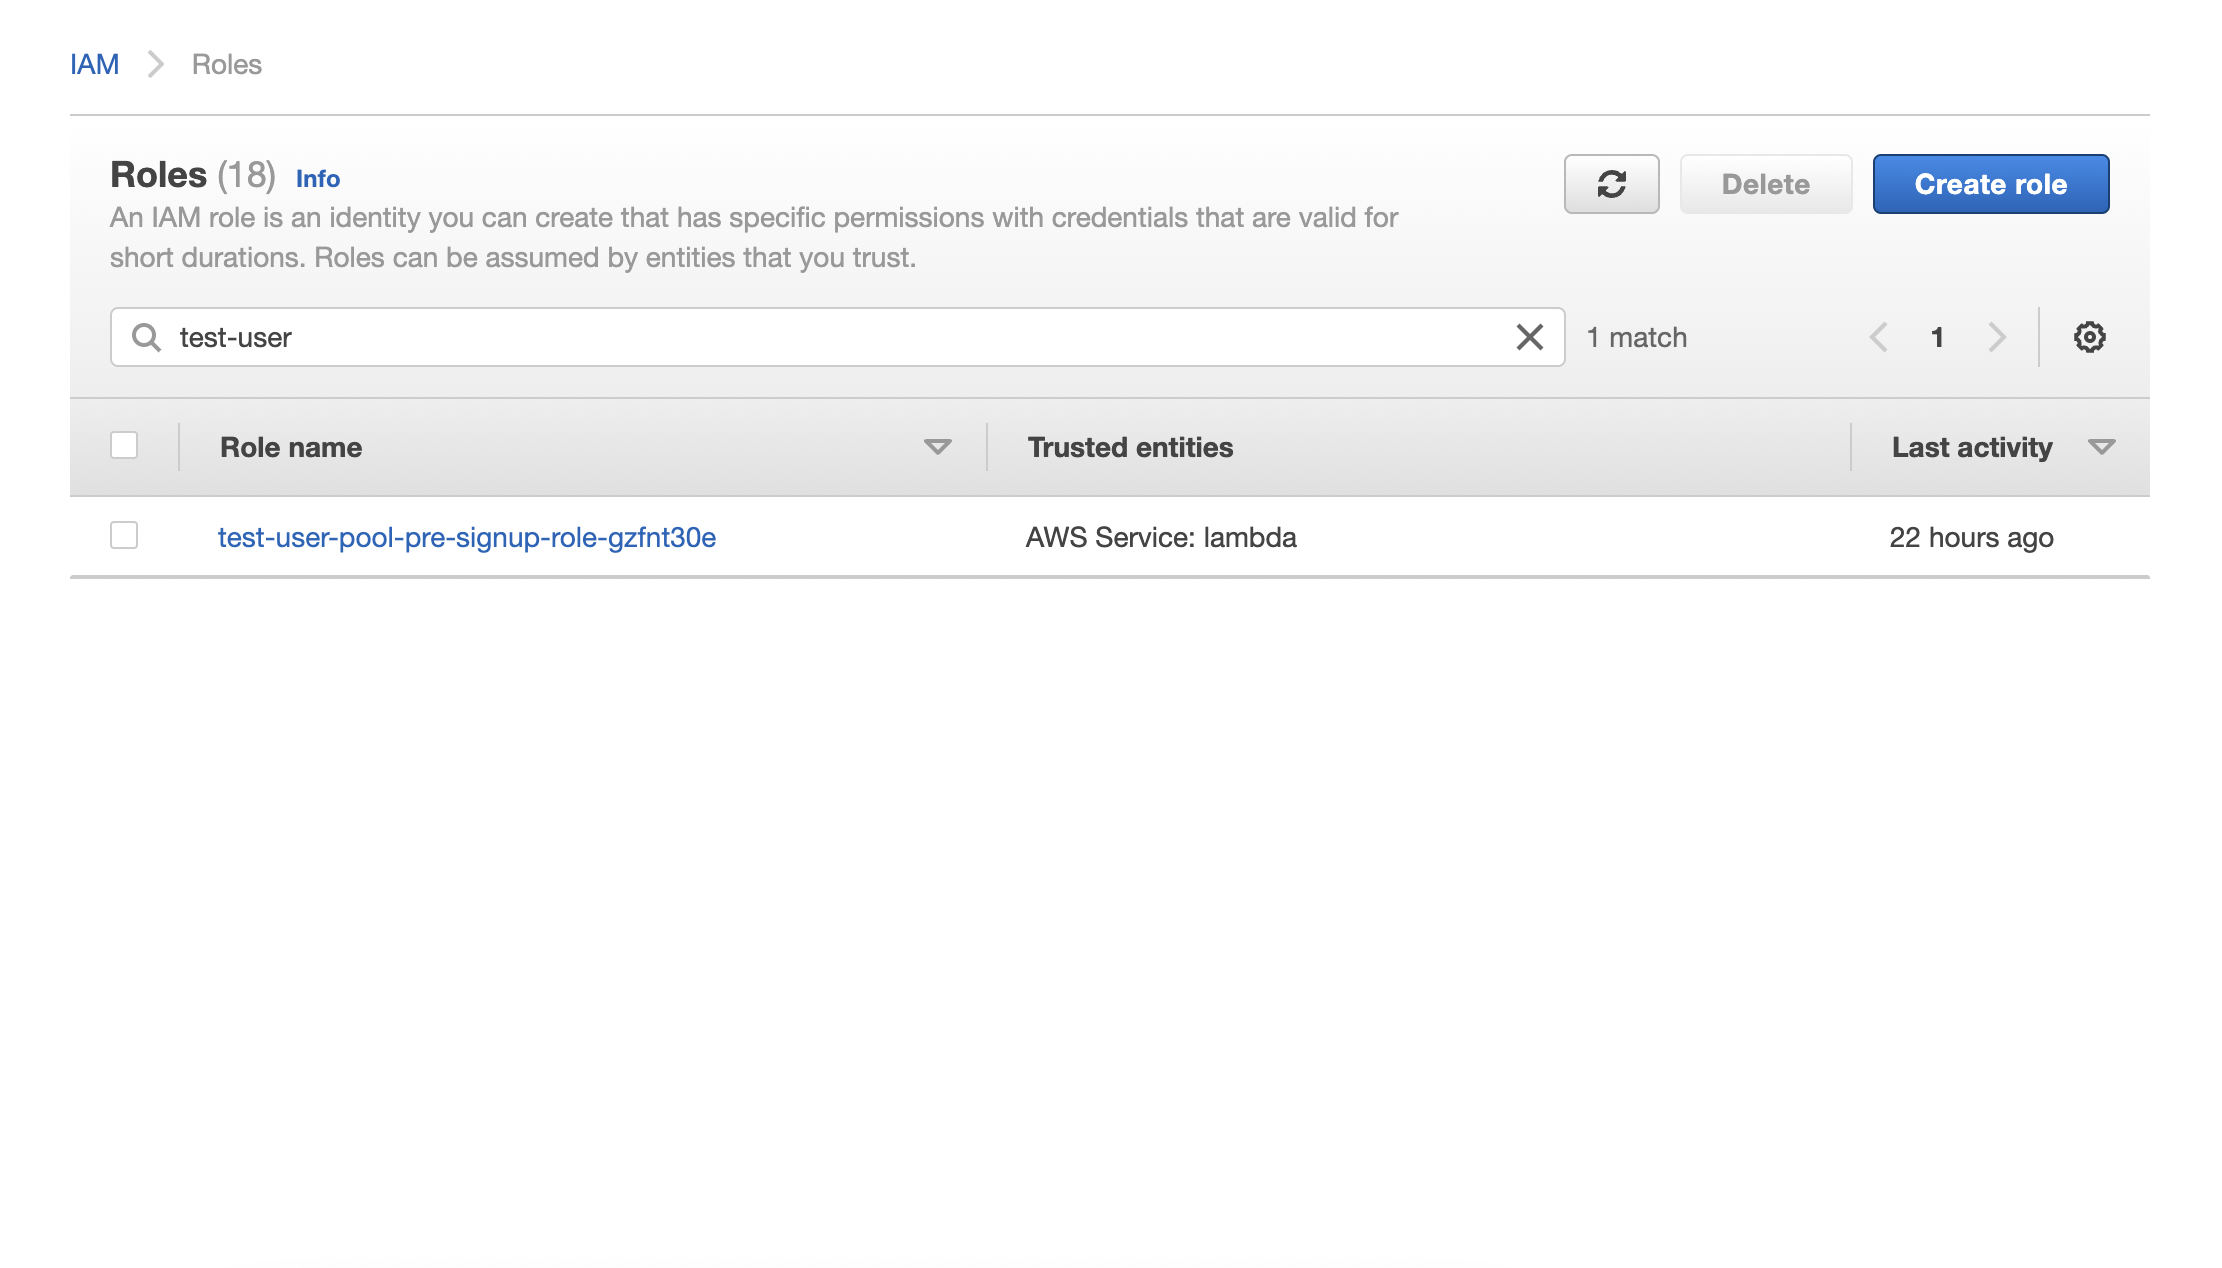
Search for the lambda's role and click on it:
Click on the "Add permissions" dropdown and then click on "Attach policies":
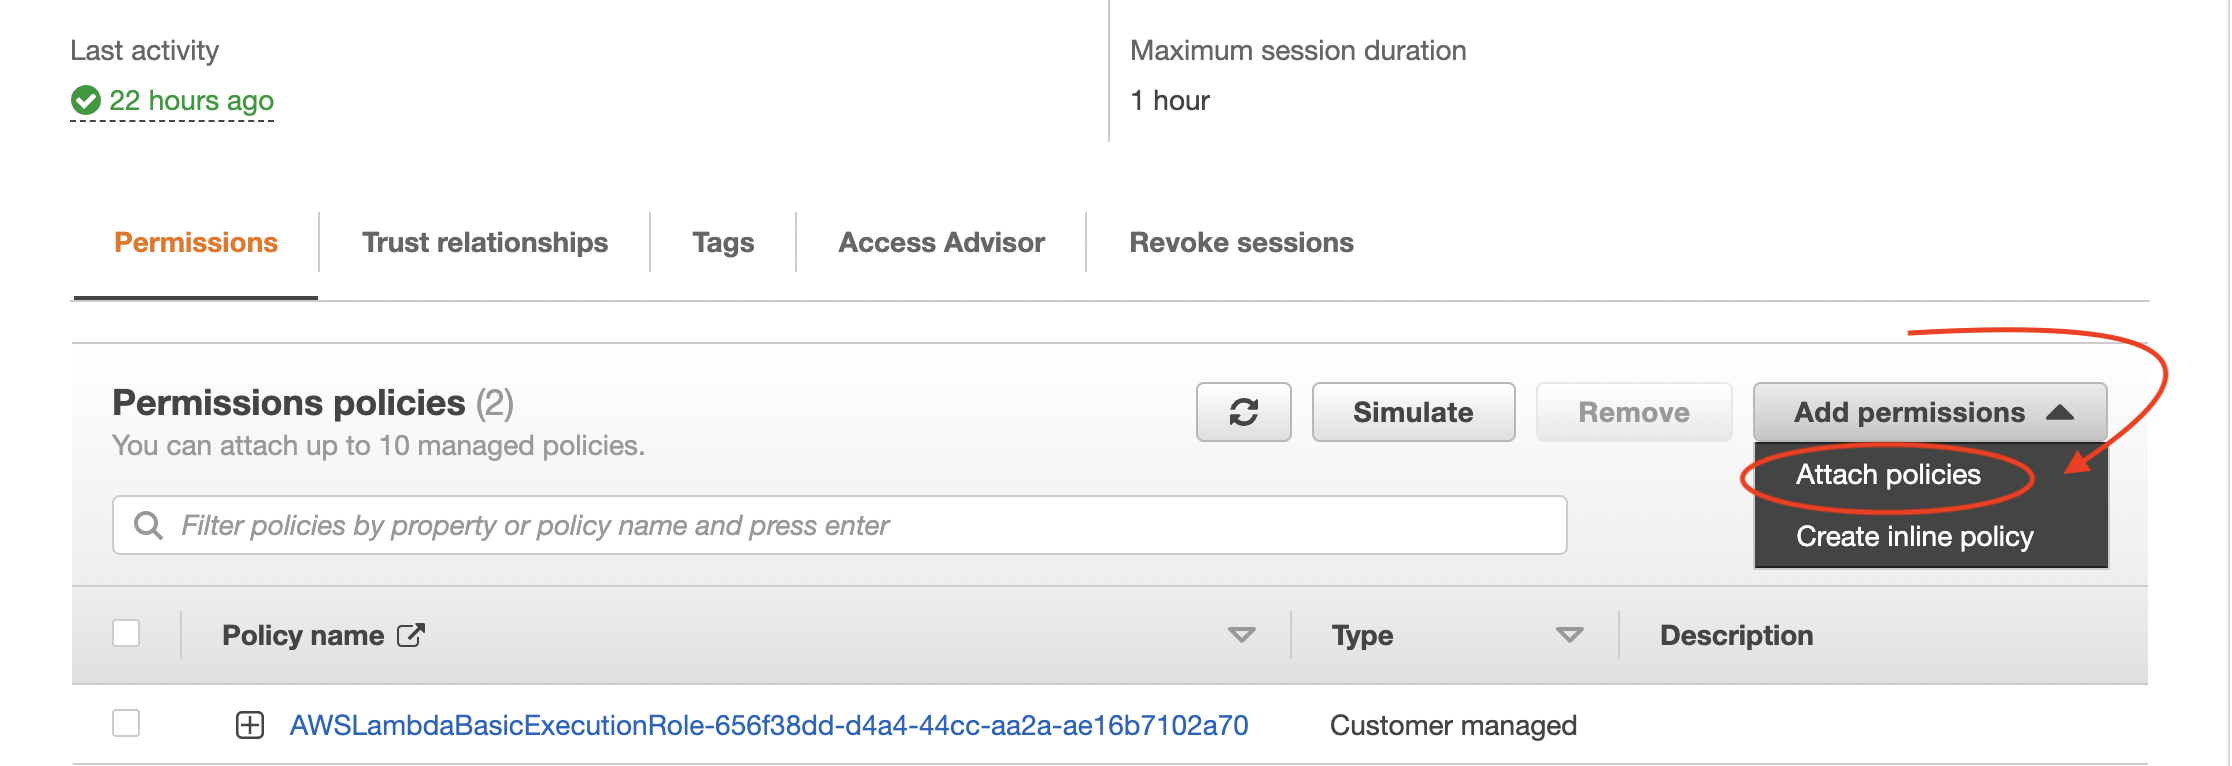
Search for the policy you just created, click on the check box and then click on "Attach policies" at the bottom of the page.
Now we have the right permissions and layers to execute this lambda. All we need to do now is set the lambda as a pre signup trigger for the user pool.
Triggers
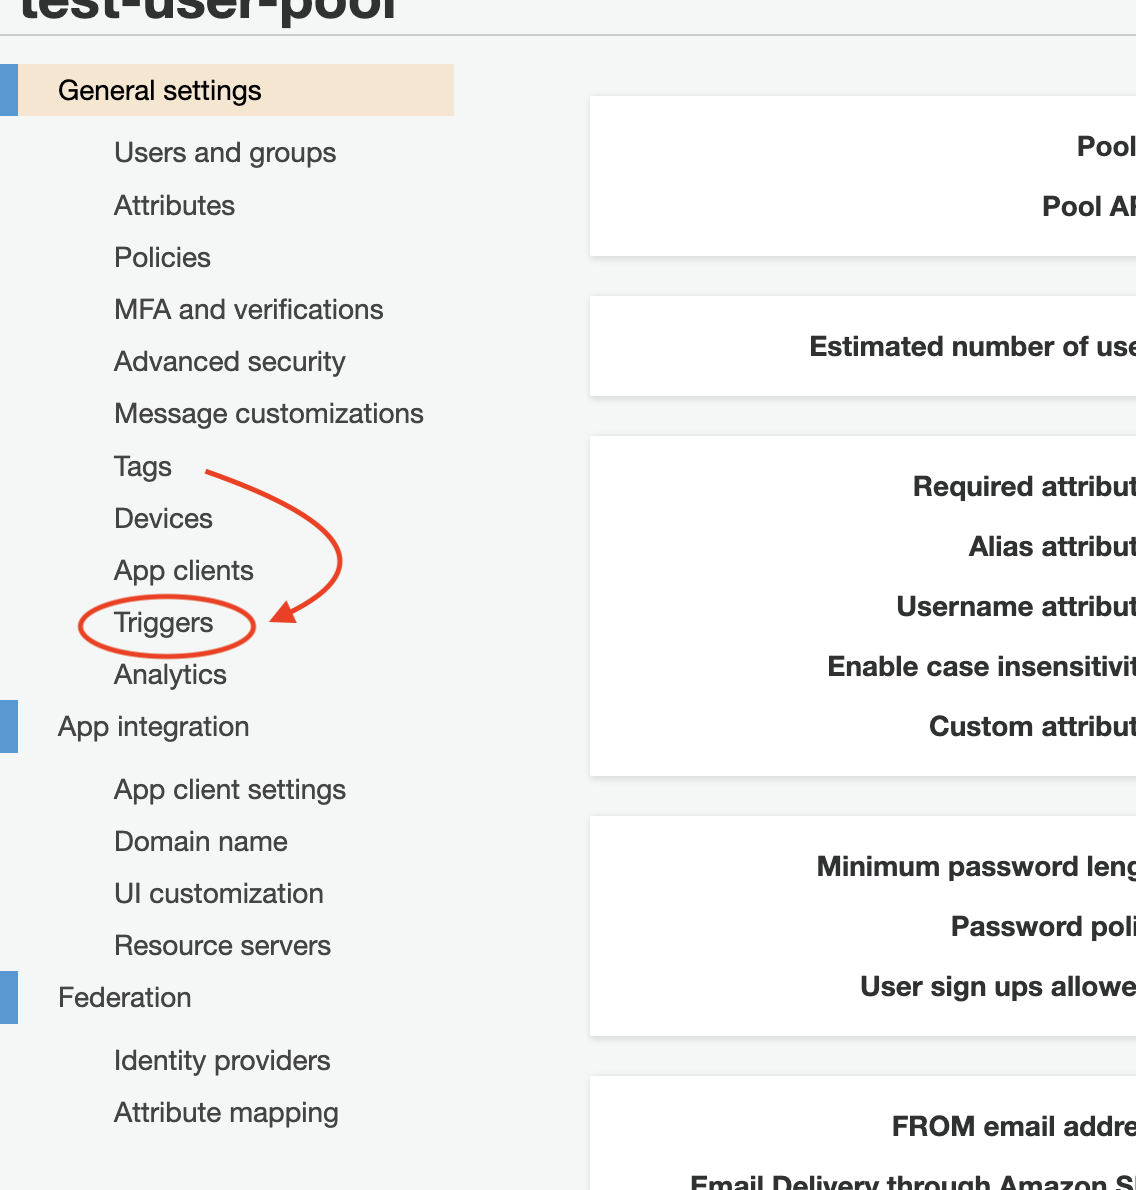
Navigate to the user pool's console and click on the "Triggers" tab:
Click on the Pre sign-up dropdown and select the lambda function we created:
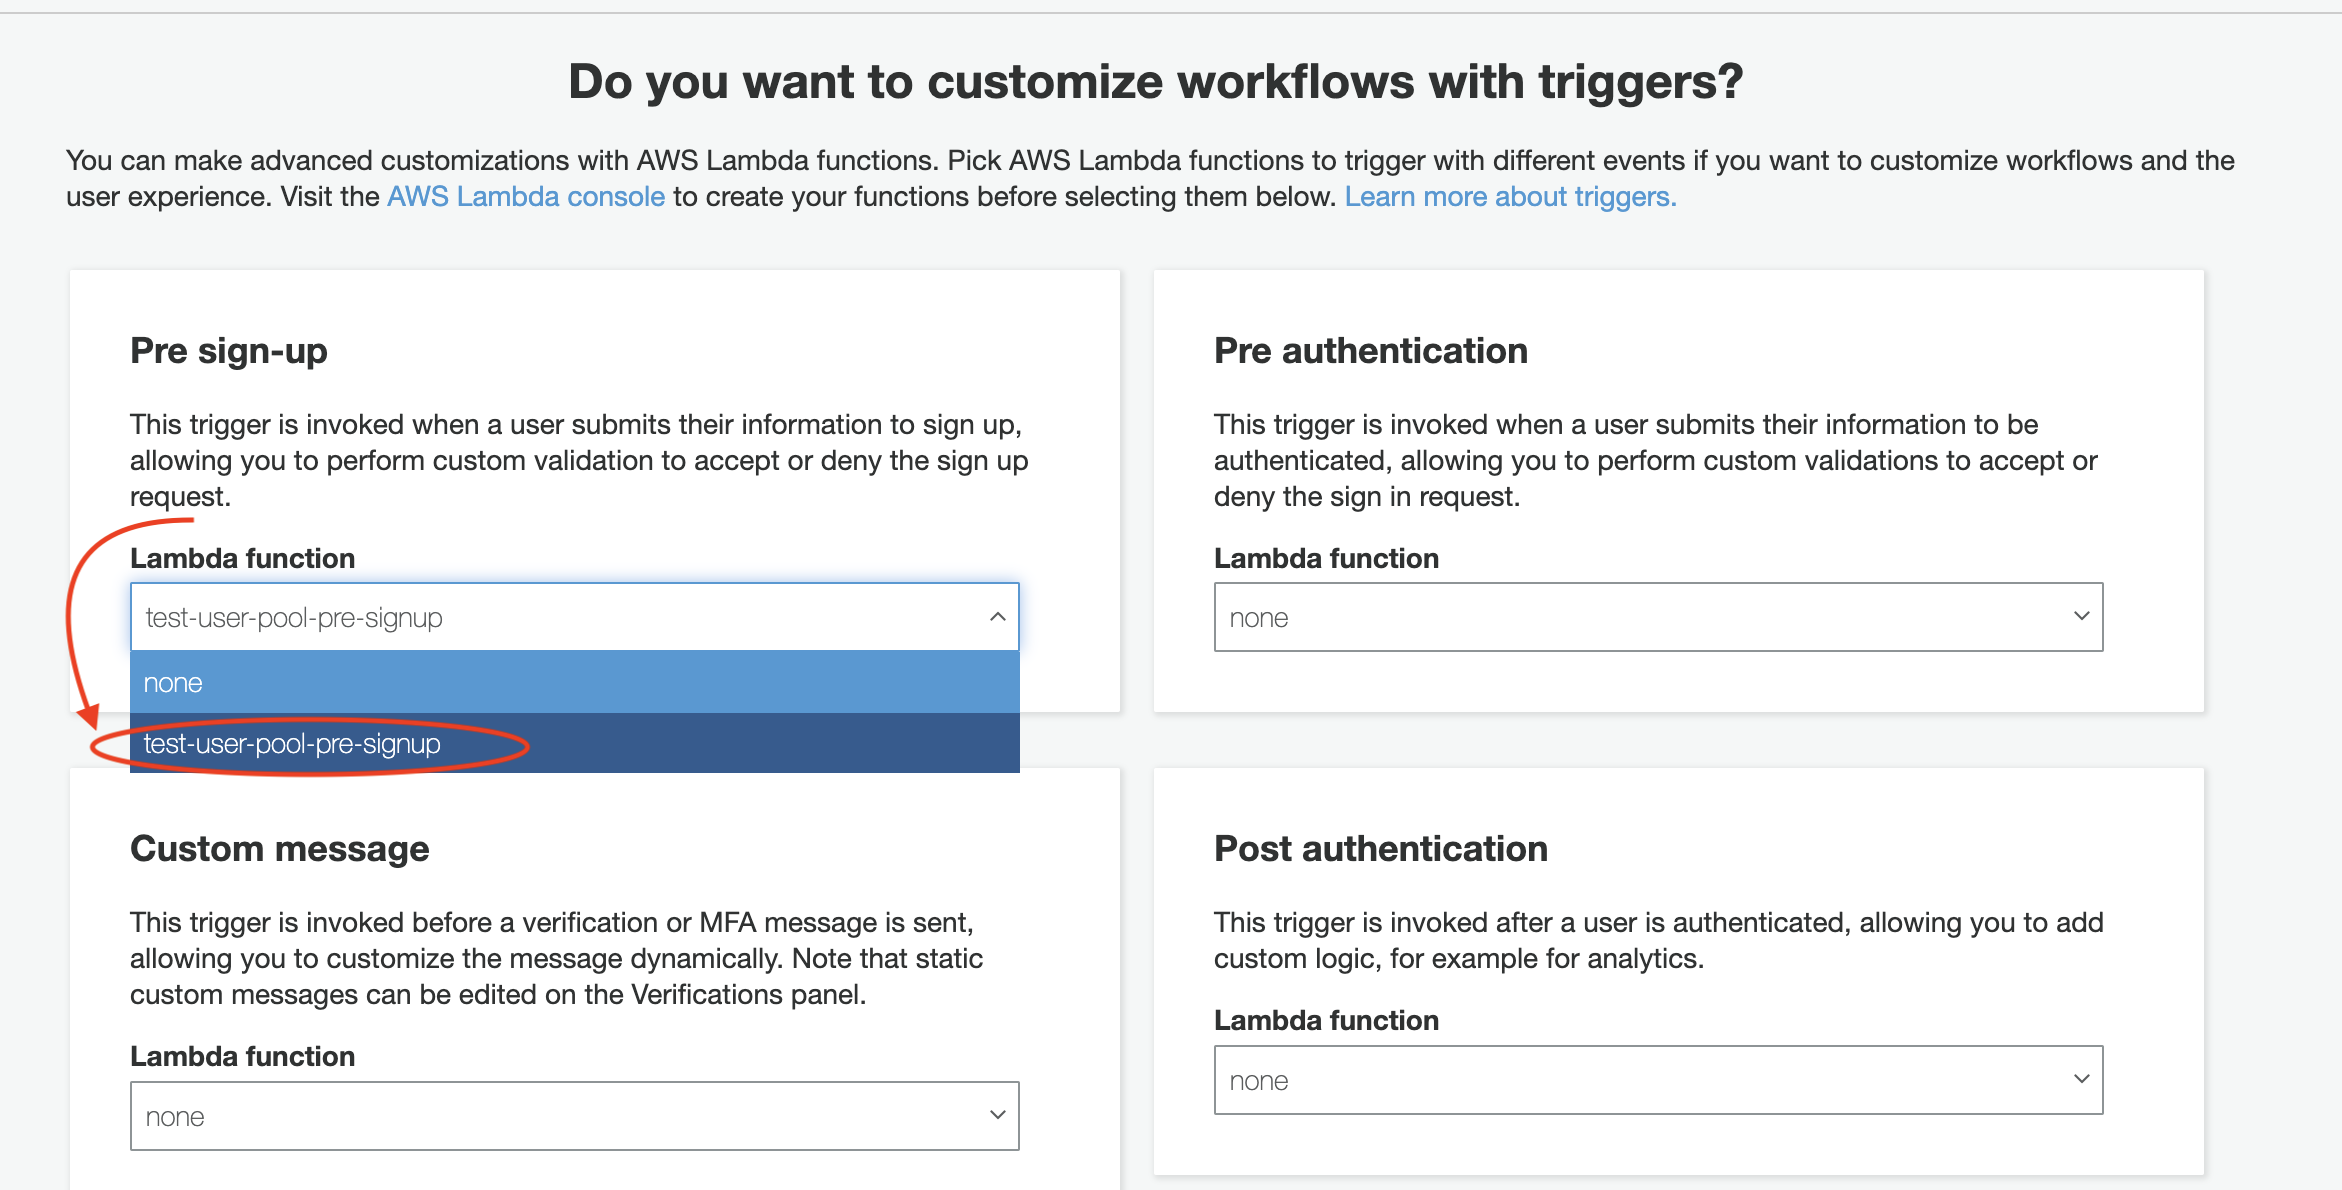
Click on "Save changes" at the bottom of the page.
Result
That's all there is to the setup for our use case. Now we can go ahead and try to sign up with an email address that is already used in the user pool. Doing so should return an error that looks like this:
UserLambdaValidationException: PreSignUp failed with error Email is already taken.
...
{
    '$fault': 'client',
    '$metadata': {
        httpStatusCode: 400,
        requestId: '3bc8f968-cbf5-4960-857f-e48daa312870',
        extendedRequestId: undefined,
        cfId: undefined,
        attempts: 1,
        totalRetryDelay: 0
  },
  __type: 'UserLambdaValidationException'
}
Bonus
You can do more with a pre sign-up trigger. The event object passed to the lambda function has a response property with the following structure:
"response": { "autoConfirmUser": "boolean", "autoVerifyPhone": "boolean" "autoVerifyEmail": "boolean" }
These all default to false. They can be set to true if you'd like to skip some parts of the default sign up flow. Before invoking the callback, you can add the following statements:
// Automatically set user's account status to CONFIRMED
event.response.autoConfirmUser = true

// Automatically set phone number as verified
event.response.autoVerifyPhone = true

// Automatically set email as verified
event.response.autoVerifyEmail = true
Comments
Join the discussionNo comments yet. Be the first to comment.
The AWS Cognito Series
In this series, I show you how to integrate AWS Cognito into your application using the AWS SDK. We will go over implementation examples and how to handle some common Gotchas and security features.